Sunday, January 10, 2010

Freshly Extruded Pasta with Ragu Bolognese

For my 18th birthday two years ago, I received a beautiful shiny red Kitchen Aid stand mixer. That stand mixer symbolizes the start of my culinary obsession.

For my 20th birthday this year, my mom surprised me with the new (and expensive) Kitchen Aid Stand Mixer Pasta Press Attachment. Anyone who knows what that is is probably incredibly jealous right now. Heck, I was jealous of myself. I had only dreamed about having the standard pasta attachment. Never in my wildest dreams did I imagine I would be the owner of one of Kitchen Aid's newest attachment.

This attachment extrudes pasta. The excitement of watching the pasta dough squeeze out in cute little shapes is indescribable. Even after having already extruded fresh pasta a good five times, it was still just as exciting to watch as the first time.

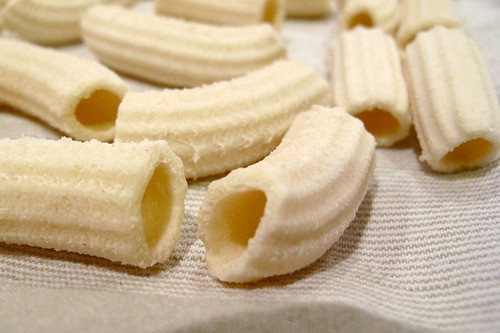
The extruded fresh pasta is not only fun to make but also has an amazing texture. Cooked al dente, the pasta is doughy and pleasantly toothsome. Being extruded means that the pasta has little ridges (see in picture below) and a rough texture. This texture helps the pasta hold onto the sauce. It's absolutely amazing and perfect. Fresh pasta is amazing!

IMG_9857

Dough for Extruded Pasta

5 oz all purpose flour
5 oz semolina flour
4 fluid ounces warm water

I weighed out flour and placed it in the bowl of my stand mixer fitted with the paddle attachment. I turned the mixer on low and slowly dribbled in the water. Don't add the water all at once. The goal is for the dough to remain only slightly wet and crumbly. If it comes together into a ball, it will be too wet and become difficult to extrude.

Feed the dough piece by piece into the attachment and watch in wonder as it extrudes out in cute little shapes!

I wish I had taken a picture of the process and of the attachment itself. It really is a beautiful attachment and the pasta is so much fun to make.

Let the pieces of pasta dry for at least 30 minutes or until the pasta feels hard. To cook, boil in water with salt and olive oil as you would with boxed pasta. The amount of time it takes to cook depends on the shape and size and dryness of the fresh pasta.


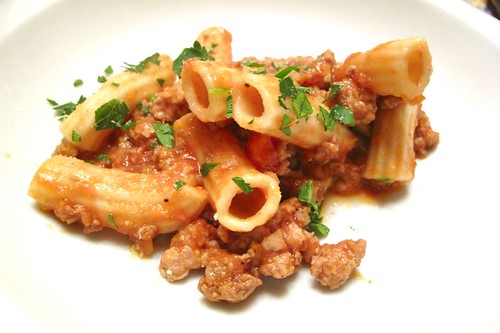
I then figured that the best sauce for the freshly extruded rigatoni I had just made would be a nice bolognese. So...I made some :)

Ragu Bolognese
recipe adapted from Mario Batali

5 tablespoons extra-virgin olive oil
1 carrot, finely chopped
1 medium onion diced
1 rib of celery
1 clove of garlic
red pepper flakes

1 pound lean ground beef
1 pound ground pork
1/4 pound chopped bacon
1/2 pound spicy italian sausage

1 small can of tomato paste
1 cup of milk
1 cup of dry white wine
sea salt and pepper to taste

Heat olive oil over medium heat. Place vegetables in a food processor and process until very finely chopped but not pureed. Add to saucepan and sweat over medium heat until vegetables are soft and translucent but not browned--about 10-15 minutes.

Add the beef, pork, bacon, and sausage over high heat. Keep stirring until the meat is cooked through but not browned. This helps give the sauce a creamy texture later on. Add the tomato paste, milk and white wine. Simmer over medium-low heat for 1 to 2 hours. Season with salt and pepper, to taste, and remove from heat.

When ready to use, cooked pasta should be added to a saucepan with the appropriate amount of hot ragu bolognese. This is an important step. It gives the pasta a chance to absorb some of the sauce and become evenly coated by the bolognese.

Garnish with chopped parsley and Parmigiano-Reggiano.

IMG_9938j

Friday, January 8, 2010

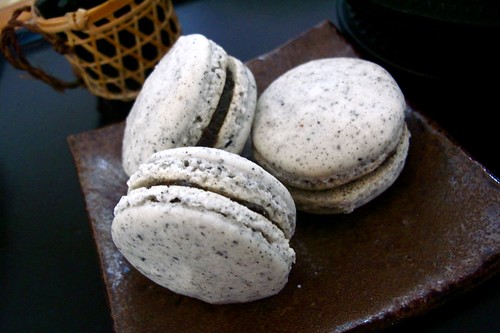
Black Sesame Macarons


IMG_0092


I have always loved the flavor of black sesame. I love the black sesame soup you can get at Chinese restaurants. I love black sesame filled mochi. So when I stumbled across a can of black sesame paste earlier this year at a Chinese market, I knew it would make the perfect filling for some black sesame macarons. One of my favorite flavors in my favorite French confections! What could be better?

When making macarons, it is incredibly important to measure out the ingredients by weight. Slight variations in the weight of the ingredients could result in hideous macarons--I speak from experience. There have been many time where I thought I was making macarons, but what came out of the oven looked like nothing like them. Luckily, I think I've got it down now :)


Sesame Macarons

recipe adapted from Tartlette
makes around 30-40 macarons

90 grams egg whites (about three)
30 grams granulated sugar
200 grams powdered sugar
95 grams ground almonds
15 grams ground black sesame seeds


I always start the process by aging my egg whites on the kitchen counter two days before I plan to make macarons. My mom believes that letting egg whites sit at room temperature for more than an hour is a questionable procedure but it really makes all the difference when it comes to making macarons! Besides, I've never heard of anyone getting sick as a result of aged egg whites in macarons.

For these macarons, I combined blanched almond slivers and black sesame seeds in a food processor with some of the powdered sugar until it turns into a fine flour. I then combine that mixture with the rest of the powdered sugar.

To make the meringue, whip the egg whites until frothy and add the granulated sugar in little by little until it forms stiff peaks.

The next part can be very temperamental. I fold the meringue into the almond mixture in two parts using a spatula. The best description I can give for the consistency you want to obtain is the consistency of lava. Really--molten lava. Don't be afraid of folding it. Granted, over-folding could prove disastrous but don't be intimidated. The mixture does need some good folding until it reaches the perfect consistency. Another way to tell when the mixture is ready is to lift up your spatula and the batter should fall back down in a thick ribbon.

Line two baking sheets with silpat and pipe the batter into 1 inch rounds. The batter will spread a little so don't make them too big or too close together.

Preheat the oven to 280 degrees F.

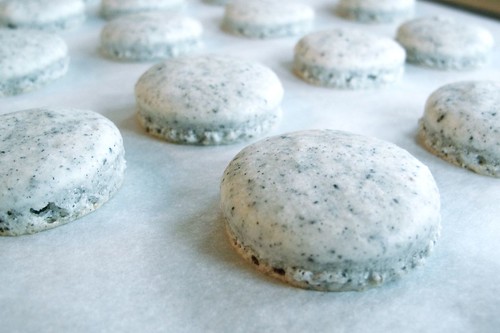
It is also crucial to let the piped macarons shells sit out for a good 30 minutes, or until slightly hardened. This allows them to develop the coveted "feet" of the macaron.

IMG_9844

Bake for 15-20 minutes and hopefully you end up with perfect little macaron shells to fill with sesame paste!


IMG_0091

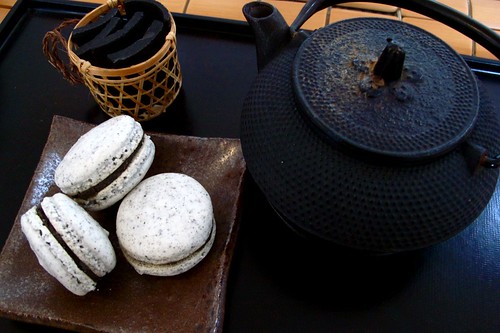
perfect with a cup of green tea!


Wednesday, January 6, 2010

Cookies for Santa


I love gingerbread. I love cookie cutters. I especially love making gingerbread cookies for Santa Claus.
I love gingerbread houses. I especially love gingerbread houses that are only 2 inches tall.

I love Christmas. I love baking. I especially love baking for Christmas! :)

IMG_0035IMG_0095

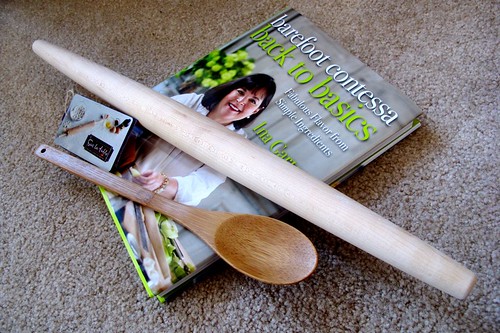
Pretty much all of my Christmas presents were food-related which was fine by me! My mom gave me an Ina Garten cookbook and rolling pin. My mom gave me the french rolling pin a few days early and although designed to roll out pie crusts in a perfect circle, it worked great for making thin crisp gingerbread cookies--just the way I like them!

To make the cookies, I used Martha Stewart's recipe for gingerbread snowflakes. I halved the recipe and added less than half of the brown sugar so they wouldn't be as sweet. I love this recipe! I made it at least three times over the past three weeks of Christmas break.

Although I used Christmas-themed cookie cutters, these cookies could definitely be consumed year round. Just use differently shaped cookie cutters. I rolled the dough out so thin the last few times I made them, they turned out more like movorian (sp?) spice cookies than gingerbread cookies. So delicious!

Gingerbread Cookies

IMG_0086

3 cups all purpose flour, plus more for work surface
1/2 teaspoon baking soda
1/4 teaspoon baking powder

1/2 cup (1 stick) of butter
1/2 cup packed dark-brown sugar
2 teaspoons ground ginger
2 teaspoons ground cinnamon
3/4 teaspoons ground cloves
few turns of finely ground black pepper
3/4 teaspoons coarse sea salt

1 large egg
1/2 cup unsulfured molasses


1. sift together flour, baking soda, and baking powder into a large bowl

2. cream butter and brown sugar in the bowl of a stand mixer with the paddle attachment until fluffy

3. mix in spices and salt, then egg and molasses

4. reduce speed to low and add flour mixture

5. divide dough in half, wrap in plastic wrap and refrigerate until cold--about an hour

6. preheat oven to 350 degrees

7. roll out dough as thinly as possible--or however thin you prefer--and cut with cookie cutters

8. bake until crisp--about 10 minutes

9. let cool and decorate as desired!

IMG_9975

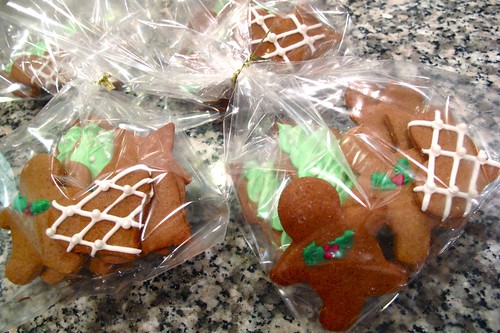
As Christmas approached, I made some to give as gifts to friends and neighbors. I was so happy just looking at them perfectly packaged on the kitchen counter. So Christmasy!

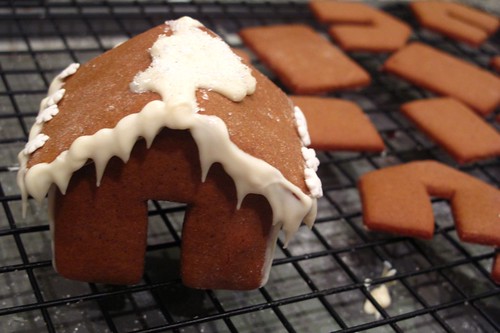
I have always wanted to make a gingerbread house but I always felt like it would require me to make a lot of dough, it would require a lot of work, blah blah blah. So I never got around to it. Finally, this year, I stumbled upon a post on tastespotting that featured little gingerbread houses that sat on the rim of your cup. I thought they were so cute! I had to give them a try. Here they are!

IMG_0115

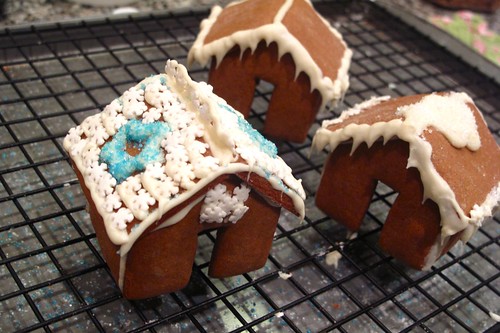
I used the same recipe as my cookies. I used the template from this site. Yes they sucessfully perched on cups but in the end, I just wanted to make a little village of houses :)

IMG_0116

Guess who made the eccentric blue-sprinkles gingerbread house?
My boyfriend hehe. He must love me. He puts up with my OCD miniature gingerbread house making and still manages to feign interest in making his own. :)

Friday, December 4, 2009

Kiyokawa

I just had one of the best Japanese meals I have ever had in my life.
It was unbelievable.


Jonathan Gold had given it a raving review:

Kiyokawa is
"home of Satoshi Kiyokawa, possibly the best unknown sushi chef in Los Angeles at the moment. His multicourse omakase dinners are epic, kaiseki-style feasts; seasonal, imaginative meals that, while not cheap, rival their equivalents at places charging two and three times as much. In my decades of reviewing restaurants, Kiyokawa may be the first place I was tempted to keep for myself."

Must be good...

didn't know it would be this good.

Except, the revered JGold forgot to mention one thing...

IMG_9750

Satoshi-san appears to be dancing as he prepares his delectable omakase. With an colorful array of the freshest fish fillets before him and a long sharp knife in hand, Satoshi appears to be performing an intricate dance with his ingredients. He assumes a confident stance as every long, smooth stroke of his knife cuts the fish before him like it was butter. The molding of each nigiri seems to involve his entire body. Rocking back and forth, fish flying from hand to hand, the rhythm of his movements seems to help to create impeccable pieces of seafood and rice. I always knew the preparation of Japanese cuisine was an art form--I had just never seen it in such a dynamic, flamboyant way. Without a doubt, sit at the sushi bar so you can marvel at Satoshi-san's moves while enjoying his interpretive, flawless creations. Watching him at his art added as much to my experience as each delicious bite.

There are pictures out there of the omakase at Kiyokawa by that I find to be absolutely stunning. These are mine. They're as much for you as they are for me to help me as I reminisce about every impeccable bite of that dinner.

Throughout my childhood, I visited many of the best sushi restaurants in Tokyo or in Taipei with my family. I've had my share of omakase meals. Nothing has captured my heart as much as Satoshi's omakase. It might be because every course involved my absolute favorite ingredients, from uni to foie gras to fresh abalone and black cod. There are my favorites ANYWHERE. Now my favorites are at Kiyokawa.

Kiyokawa
265 S. Robertson Ave
Beverly Hills, CA
(310) 358-1900

IMG_9754

cucumber, spinach, lotus root, burdock root


IMG_9798
IMG_9758
IMG_9760

bluefin tuna from Spain, Santa Barbara sea urchin, fresh abalone, halibut, freshly grated wasabi

Satoshi asked if I had any preferences when it came to sashimi. I answered: "anything that comes in a shell!" This resulted in deliciously fresh abalone, creamy sea urchin, and later on, sweet scallop. I was in heaven.

IMG_9765
IMG_9770
IMG_9773IMG_9771
IMG_9769IMG_9774IMG_9772

seared foie gras, marinated sea urchin, snow crab on cripsy wonton, seared hamachi with japaleno, kumamoto oyster with cavier and gold leaf, halibut in hot oil

This was a plate full of little treasures. I can't even find words to do them justice. Each little compartment held two bites of the most perfect flavor and texture combinations I have ever encountered. While reminding me a little of Japanese bento boxes in how it was organized, this dish was a very modern take on Japanese cuisine in both taste and presentation. I loved it.


IMG_9779IMG_9778

daikon, silken tofu, taro in broth

Don't let the seemingly bland and boring look of this dish fool you. It was delicious! The broth was good but the most amazing part was the piece of daikon in the back. It was so good! Spoon tender while maintaing its texture, the daikon had soaked up the flavor of the broth and each bite only made me want more.


IMG_9781IMG_9783

miso marinated black cod

I love miso marinated black cod. I've never had it paired with a salad. Ingenious! The salad was dressed in sesame oil and was perfect for balancing the fatty goodness of the cod.

The next dish was a amazing "japanese matzo ball" soup. It was a big ball of light fluffy tofu mixed with sweet scallop that was deep fried and then put in a thick clear soup. SO GOOD. I only wish I had taken a picture of it before I devoured it all. I was trying to eat it some of it before the soup made the entire ball of goodness soft. I got a few good mouthfuls of tempura in soup before the whole thing disintegrated into the delicious soup.

After that soup, I was officially starting to get full. The final plate of nigri was just the thing I needed. Some more fish and sushi rice!


IMG_9787

tuna, halibut, mackerel, scallop, uni


IMG_9794

black sesame ice cream

Such a delicious departure from boring green tea ice cream. I LOVE black sesame and this ice cream was probably the best I've had in a while. It was so good, it inspired me to make black sesame macarons during xmas break ;)


**I know it's taken me more than a month to finally put up this post! Christmas break meant I was in the kitchen all day at home and actually making food rather than sitting at my desk at school just looking at food blogs all day. There will definitely be a LOT of blogging for me in the next few days! :)