Showing posts with label Recipes. Show all posts

Thursday, January 20, 2011

Simple Roasted Chicken

IMG_2515
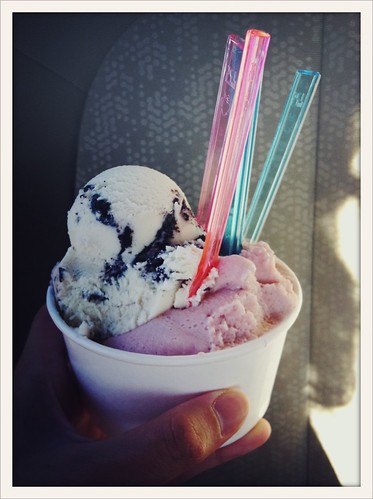
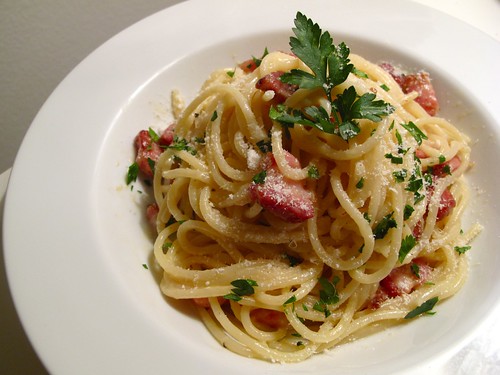
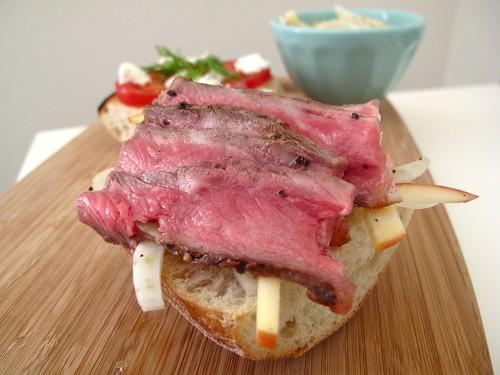
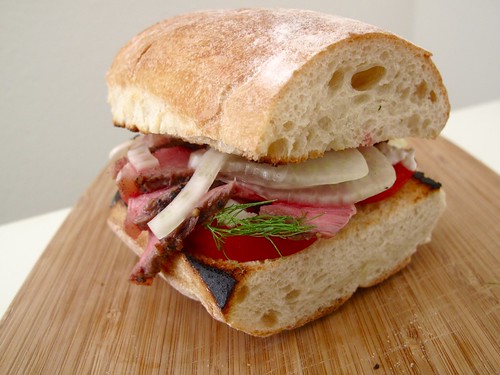
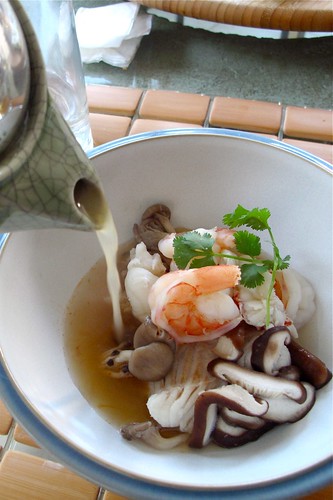
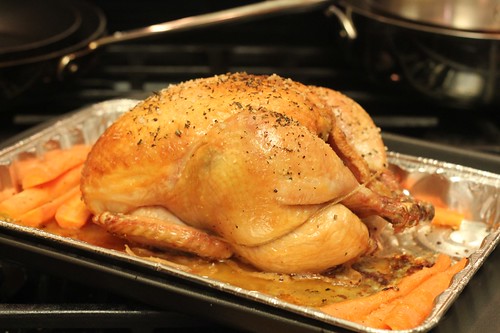
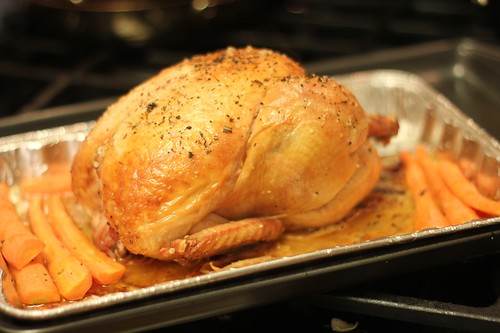
One Tuesday night, I accidentally took a two hour nap. I woke up at 9:30PM with an urge to go grocery shopping. Not very good at resisting my food-related urges, I walked into Ralph's at 10:00PM and bought myself a nice organic, free-range chicken. This is why I roasted a chicken on a random Thursday night.

IMG_2506
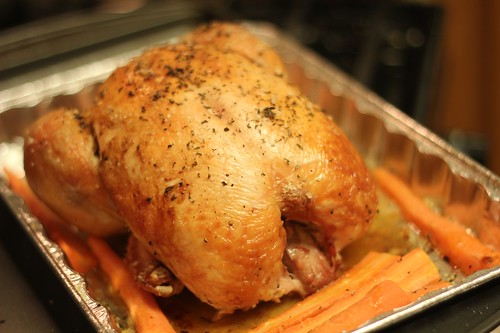
This is the second time I've roasted a chicken using this procedure. The last time I did it was for Thanksgiving. Both times were a success, so I can confidently say, this is a foolproof method. Basically, watch this Thomas Keller video, follow it, and you'll have a delicious, perfectly-cooked chicken that is juicy and flavorful with a golden, crispy skin.

IMG_2502
Here are some key points:

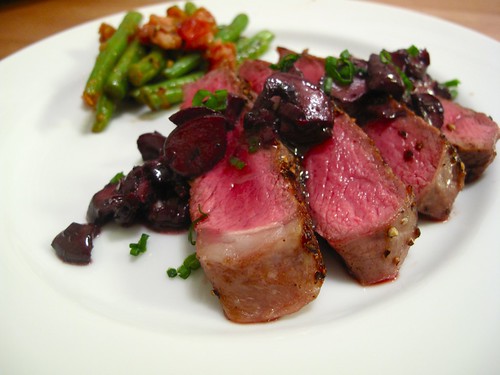
1. Pick out a 2-3 pound bird. The smaller ones taste better.

3. Rinse the chicken. Exfoliate the skin with salt if you have too much time on your hands. It's not really necessary but you do end up with taunt, beautiful looking chicken skin. Pat the chicken try with paper towels.

4. Salt the chicken inside and out. Leave it uncovered in the fridge overnight. Thomas Keller doesn't do this step, but I feel like it makes the meat more flavorful.

5. Before roasting, make sure the bird is REALLY dry. This helps the skin crisp up and ensures the bird is roasting rather than steaming.

6. Stuff the chicken with cloves of garlic, thyme, and rosemary. Sprinkle coarse sea salt and freshly ground pepper on the skin. You should be able to see the the coarse salt on the skin even after it's roasted.

7. Truss the chicken! Sounds complicated but it really isn't, and it's an important step in getting the chicken to cook evenly. If you're unsure of how to truss a chicken, there are plenty of YouTube videos to watch. That's how I learned.

8. Roast at 450 degrees Fahrenheit for 50-60 minutes. Don't disturb the chicken! No flipping, no basting, maybe just rotate the pan once halfway through.

9. Carve the chicken and eat breast, thighs, etc. and eat civilly with knife and fork. Then, as a late night snack, attack the carcass with you bare hands and get all the good meat between the bones. Don't miss the chicken "oysters"--they're the best part.

IMG_2529

Saturday, January 8, 2011

Ice Cream and Biscotti

2010 was fantastic.

Most significantly, food blogging really became than just a hobby for me; it became an integral part of my life. I usually tell people that I started blogging because of my time in Paris during the summer of 2009 (which is true), but as I reflect upon my blog, I realized that I was never really serious about it until a few months after.

Near the beginning of 2010, I attended The Gold Standard. It felt like my official introduction to the food and wine culture in L.A. It was my first time attending a food event, and every little bite felt like an informal "hello!" from the restaurants Jonathan Gold called his favorites.

During spring break, I had my first meal at L'Atelier de Joël Robuchon in Taiwan, after which I really became more aware of the beauty in the plating of food. It was the first time I'd witnessed such precision in what goes on a plate, and I was completely awestruck the entire meal.

Around the same time, by some cosmic chance, I was invited to a FoodDigger preview dinner at Ludobites 4.0. It was my first "real life" interaction with other food bloggers, and I was finally able to begin putting faces and blog names together.

After that, it snowballed, and I'm sincerely grateful to have found so many new foodie friends. It really is a joy to eat with people who enjoy food as much as I do. I began eating out much more often with food bloggers including a dessert tasting at the now-closed Sona with Tsz and a Hatchi dinner at Breadbar with Helen.

I then spent the summer in Spain where I consumed a ridiculous amount of tapas and sangria and had an unforgettable molecular gastronomy experience at Comerç 24. The summer continued to Bordeaux to attend a wedding at a wine château before my final stop in Paris. Perhaps the culmination of my gluttonous year was my stay in Paris with my mom. The Michelin star restaurants we ate at--including Le Jules Verne, Le Cinq, L'Arpège, and L'Astrance--remain unblogged because how to write about their magnificence still escapes me.

As a new school year started, I moved out of the dorms at UCLA and into a new apartment with the best roommates a girl could ask for. I finally had my own kitchen, and I can't even begin to explain the difference that made. I also started a food writing internship at Los Angeles Magazine with Lesley in the Dine department. It has been immensely rewarding in more ways than one, and I definitely hope to continue with it this year.

2010 also marks the year I finally mastered the macaron.

But enough about 2010. I want to talk about 2011 and my exciting new gig at Scoops Westside. This is perhaps the biggest step I've made so far towards my dream of opening up my own patisserie someday, and it's all thanks to "The Ice Cream Man."

Scoops Westside
3400 Overland Ave.
Los Angeles, CA 90034
tel: 323-405-7055

photo-16
As many of you may know, Matt of Mattatouille recently opened up Scoops Westside, the second location of an ice cream shop with exciting flavors such as Pistachio Jasmine, Guiness Chocolate, and Maple Black Truffle. On top of that, he offers Intelligentsia drip coffee and loose leaf tea. It is the best coffee I've had to this day. Within the short time that Scoops Westside has been open, the place has not only become an after school introduction of exotic flavors to little kids who think they only like plain vanilla ice cream, but also a laid back hangout for the foodie community of L.A.

IMG_0444
So when Matt asked me if I'd like to bake some of my biscotti for him to sell at Scoops, I thought I'd misheard him. I had brought him some as a treat, but never in my wildest dreams did I think he'd like them enough as to want to sell them in his shop. That night, I was so excited I couldn't sleep. The next day, I showed up with at Scoops with a fresh batch of Orange Almond Biscotti for sale. Please stop by and try some with your ice cream or coffee!

IMG_0447
And here is the recipe for that biscotti. I think it's the best biscotti recipe I've ever used.

Orange Almond Biscotti
makes about 40

3 1/4 cups all purpose flour
1 tablespoon baking powder
1/3 teaspoon salt
1 1/4 cups sugar
10 tablespoons (1 1/4 sticks) unsalted butter, melted
3 large eggs
1 tablespoon vanilla extract
1 tablespoon orange liqueur (I used Cointreau)
1 tablespoon orange zest (make sure it's a really fragrant orange--it makes all the difference)
1 cup (8 oz) sliced almonds

1 large egg white

Directions:

1. Preheat oven to 350°F

2. Sift flour, baking powder, and salt into a bowl. In another bowl, mix sugar, melted butter, 3 eggs, vanilla extract, orange liqueur and zest together with a wire whisk.

3. Add the flour mixture into the wet mixture and stir with a wooden spoon until just blended. Mix in sliced almonds.

4. Divide the dough into two, and using floured hands, shape each piece into 13 1/2 inch long by 2 1/2 inch wide logs. Transfer both logs to a silpat or parchment paper lined baking sheet.

5. Brush the tops and sides of the logs with egg white.

6. Bake the logs for 25-30 mins or until golden brown.

7. Let the logs cool completely, about 25 minutes. Once cool, cut the logs diagonally into 1/2 inch slices using a serrated knife.

8. Transfer the slices back onto the baking sheet and bake for 12 minutes. Turn the slices over and bake for another 6-8 minutes.

9. Transfer the slices onto a rack and let cool completely.

10. Enjoy with a cup of Intelligentsia coffee :)

IMG_0463

So as 2011 begins, I am infinitely optimistic about my love affair with food. With a fresh header at the top of my blog, and a new DSLR at my side, 2011 is bound to be just as fantastic as 2010.

Friday, December 3, 2010

Gingersnaps & Gingerbread Men

It's finally December, which means I can start celebrating the Christmas season to my heart's content. I'll be honest, I've been listening to Christmas music since the week before Thanksgiving and baking gingerbread cookies since the day right after, but it definitely seems more appropriate to do these things in December.

IMG_0137
I love both of these ginger cookie recipes. Both recipes are great, and although their ingredients are similar, the different proportions of flour to leavening and sugar to butter make them taste completely different. And the smell of these cookies when they're in the oven is magical! I promise your house will literally smell like Christmastime.

Also, these are great recipes to make simultaneously. The ingredient list is practically identical, and the baking temperatures are both at 350 degrees. Both require a quick chill in the fridge, so while one batch of gingersnap dough is chilling in the fridge, you can whip together a batch of gingerbread men dough.

EAT MY BLOG official logo
I just finished making these gingersnaps and gingerbread men for this Saturday's Eat My Blog bake sale. For those of you who don't know, Eat My Blog is a charity bake sale put together by Cathy of Gastronomy Blog. All proceeds go to Los Angeles Regional Foodbank. I've been wanting to participate in it ever since she started the event, but this was the first time I've had my own kitchen to do some baking in. My cookies have some pretty humble ingredients compared to some of the exotic and elaborate treats that are going to be for sale, but they're perfect for the holiday season. Make sure you stop by on Saturday, December 4th, at Tender Greens (8759 Santa Monica Blvd) in West Hollywood from 10:00am.m-4:00p.m. for some sweet treats!

Incredibly Crisp Gingersnaps
makes about 50

2 cups all-purpose flour
2 teaspoons baking soda
1/2 teaspoon salt
1 teaspoon ground cinnamon
2 teaspoon ground ginger
1/2 teaspoons ground cloves
12 tablespoon (1 1/2 sticks) unsalted butter
3/4 cup sugar
1 large egg
1/4 cup molasses
sugar for finishing

1. In a bowl, sift together flour, baking soda, salt, and spices.
2. In another bowl, cream butter with sugar until light and fluffy. Add egg and continue beating until well incorporated.
3. Add half the flour mixture then add in molasses and combine before adding remaining flour mixture. Mix only until just incorporated.
4. Chill in refrigerator for at least 30 minutes. The dough can be made the day before.
5. Using an 1-inch cookie dough scooper, make balls of dough to roll in sugar before placing on a silpat-lined baking sheet. Leave plenty of room between the cookies (3 inches) because they will spread in the oven.
6. Bake at 350 degrees Fahrenheit for 12-15 minutes.

IMG_0127

Gingerbread Men

3 cups all-purpose flour
1/2 teaspoon baking soda
1/4 teaspoon baking powder
1/2 cup (1 stick) unsalted butter
1/2 cup packed dark brown sugar
2 teaspoons ground ginger
2 teaspoons ground cinnamon
3/4 teaspoons ground cloves
1/2 teaspoons finely ground pepper
3/4 teaspoons coarse sea salt
1 large egg
1/2 cup molasses

1. In a bowl, sift together flour, baking soda, and baking powder.
2. In another bowl, cream together sugar and butter until light and fluffy. Then add in spices and salt. Combine before adding the egg and molasses. Mix until incorporated.
3. Add flour mixture and mix on low until just incorporated. Divid the dough into two parts. Wrap each individually and chill in the fridge for at least 30 minutes.
4. Sprinkle some flour on a flat surface and roll out the dough to 1/4 inch thickness. Using cookie cutters, cut out the gingerbread men and place on a silpat-lined baking sheet.
5. Bake at 350 degrees Fahrenheit for 8-10 minutes depending on the size of the cookie cutter you're using. A 2-inch tall gingerbread man takes about 8 minutes in the oven.

IMG_1448
Royal Icing recipe for decorating:
4 cups powdered sugar
3 tablespoons meringue powder
1/4-1/2 cup water
Food coloring gels

Mix together with a hand mixer until stiff peaks form. Feel free to adjust the consistency with either more powdered sugar or more water. Decorate!

Tuesday, November 30, 2010

Earl Grey Salted Caramel Macarons

IMG_4188
These are my new favorite macarons to make. The Earl Grey tea makes them wonderfully fragrant, and the salted caramel adds not only a great balance of salty and sweet, but also gives the macarons a little chewier texture than usual.

And when I say Earl Grey, I mean Earl Grey. There are little bits of tea leaf running through the shells, and the heavy cream used to make the caramel is infused with the tea itself.

IMG_4189
See the specks of tea leaves. Smell the intoxicating bergamot scent. And finally, taste the floral, chewy macaron. If you really wanted to go crazy, have them with a warm cup of Earl Grey tea.

Even after months of not making any macarons, they were relatively cooperative and didn't really give me any trouble. I thought I would be a little rusty, but I think making macarons has become second nature to me. I experimented with the filling this time and did a combination of two different caramel fillings. In the center, I made a caramel that I softened with a little butter. Around the caramel center, I made a salted caramel cream cheese frosting to temper the sweetness of the caramel. Filling the delicate shells with only caramel would have been overwhelming.

Earl Grey Salted Caramel Macarons
makes 24 macarons

for the macarons shells:
110g blanched almond slivers
200g powdered sugar
90g aged egg whites
30g fine granulated sugar
2 tea bags Earl Grey tea ( I used Tazo)

As always, make sure to age the egg whites for at least 24 hours, preferably 48 hours. Weigh out the ingredients accurately. Combine 110g blanched almond slivers with 200g of powdered sugar with the tea leaves from 2 tea bags of Earl Grey tea. in a food processor. Process until very fine and sift into a bowl. Process any larger pieces left over.

In the bowl of a stand mixer, beat 90g of egg whites on high until frothy. Add in 30g of granulated sugar gradually, taking care to incorporate sugar well after each addition. Beat until relatively stiff peaks form. You should be able to invert the bowl and the meringue should stay in place.

Add half of the almond and powdered sugar mixture into the egg whites and gently fold to incorporate. Add the rest of the mixture and fold until the consistency of lava. Fold carefully. You would rather under-mix than over-mix the batter.

Pipe 1 inch rounds onto silpat lined baking sheets, giving them ample space because they will spread a little. Let them rest for 30 minutes or until the tops aren't sticky to the touch.

Heat a convection oven to 260 degrees F and bake for 20 minutes. Let cool on the baking sheets. I prefer to let them cool and "dry" out a little bit overnight before filling them the next day.

for the caramel:
1/4 cup heavy cream
1 Earl Grey tea bag
1/2 cup granulated sugar
1 tsp coarse fleur de sel
2 tbsp water
1 tbsp butter

Heat 1/4 cup of heavy cream with 1 Earl Grey tea bag. Let the tea infused until the heavy cream is a warm tan color.

Combine 1/2 cup of granulated sugar with 2 tbsp of water in a deep saucepan. Cook until a golden brown amber color. Watch the mixture carefully because it can burn in the blink of an eye.

Carefully add in the heavy cream mixture and turn off the heat. Be careful because the mixture will seize and bubble up when the cream is added. Don't panic. Just keep stirring and it will calm down. Add in 1 tbsp of butter and 1 tsp coarse fleur de sel. Make sure it is a quality sea salt. It makes all the difference.

Make two batches, one for the center of the filling, and one for the cream cheese filling.

for the salted caramel cream cheese filling:
1 batch of caramel sauce
4 oz unsalted butter, softened
4 oz cream cheese, softened
50g powdered sugar

In the bowl of a stand mixer fitted with a paddle attachment, combine 4 oz unsalted butter with 4 oz cream cheese. Beat until light and fluffy. Add in sugar and incorporate well. Add in 1 batch of caramel sauce, cooled almost to room temperature, and beat to incorporate.

To fill the macarons, place a small amount of caramel in the center of a shell and encircle that caramel with the cream cheese mixture before topping it with a matching macaron shell. Place in refrigerator and let them "mature" overnight. Macarons will retain their optimal texture for about 3 days.

IMG_4185
P.S. I also made that celadon-glazed ceramic piece in the background! :)

Saturday, November 13, 2010

Broccoli Beef

IMG_3462

Sometimes I crave Chinese food. Not legitimate Chinese food, but the Americanized, Panda Express-esque version. "Blasphemy!" you might say. I say it's perfectly alright to appreciate bastardized Chinese food.

However, when Panda Express is less okay than usual, I turn to my own wok and stove for my version of Broccoli Beef. It could not be easier to prepare and making it yourself means you can really control the quality of ingredients. I love cooking the broccoli just enough so it's still slightly crunchy and marinating the beef first to get more flavor penetration. I'll be honest now and admit I don't actually own a wok, but really, any kind of skillet will work.

IMG_3458

Broccoli Beef
serves 2

marinade/sauce
3 tbsp oyster sauce
1 tbsp soy sauce
1 tsp honey
2 tbsp mirin
sriracha

sliced beef
1 broccoli crown
vegetable oil
garlic

First, put together the marinade. Feel free to adjust the ratios in the marinade to your own tastes--more mirin and honey to make it sweet or more sriracha to make it spicier.

Place the beef in the marinade and for about 15 mins. It does not need to be marinated for very long if your cut of beef is thinly sliced.

Break the broccoli crown down into smaller, bite-sized pieces.

Heat vegetable oil and garlic in a skillet. Do not brown the garlic too much or it will end up being a little bitter. Add the marinated beef and cook until just cooked through. Reserve the residual marinade.

Take the beef out and add the broccoli pieces to the pan. At this point, add the rest of the marinade to the broccoli and cook until desired doneness.

Add the beef back into the skillet and combine.

Serve with a steaming bowl of rice and be glad you're not eating Panda Express!

Tuesday, November 2, 2010

Spaghetti Carbonara

IMG_3446

Spaghetti Carbonara is the definition of a guilty pleasure. Starchy noodles, eggs, cheese, pork fat...it doesn't get any better. So although I wouldn't recommend this as a weekly dish, it's perfect for that special dinner. A red checkered tablecloth, bottle of wine, and some candles, and you've got a romantic night at home.

Spaghetti Carbonara
serves 4

1 lbs spaghetti
4 eggs
1 cup grated parmesan cheese
1/2 lbs pancetta, 1/4 in thick, cubed
3 cloves of garlic, minced
salt
pepper
fresh italian parsley

IMG_3449
I used pancetta from Whole Foods. I asked the guy behind the counter slice it to a quarter inch thick because thinly sliced pancetta just does not cut it in this dish. The cubed pieces of pancetta add an important textural component to the dish--some pieces are crispy, while some still have a pleasant chew. Also make sure that you use a good quality parmesan. We grated a block of parmegiano reggiano ourselves.

1. Boil spaghetti for the amount of time indicated on the package in liberally salted water--this is your only chance to season the pasta itself!

2. Beat 4 eggs and add 1 cup of parmesan. You may also crack some fresh black pepper into this mixture.

3. Add pancetta to a pan without any oil--trust me, the pancetta will render enough fat on its own.

4. Cook until browned, but not all the way crispy. We want to maintain a meaty chew to the pancetta.

5. Right before the pancetta is finished cooking, add in minced garlic. Make sure the garlic does not burn.

6. Drain pasta and add it directly to the pan with the pancetta, garlic bits, and glistening rendered pork fat. (you could drain some of the fat, but why would you want to lose that liquid gold?)

7. Add egg and cheese mixture to the pasta and stir vigorously to keep the egg from scrambling. The eggs, cheese, and fat will coat the noodles in a luxuriously thick and creamy sauce. If it is too thick, feel free to add some of the pasta water to loosen it up.

8. Garnish with fresh parsley and some more grated parmesan.

IMG_3452
Buon Appetito!

Wednesday, October 27, 2010

Steak Dinner and Lunch

I set the fire alarm off at least 10 times last night. I was just trying to cook a steak.

I swear it's not my fault. Nothing burned, nothing bubbled over, and nothing caught on fire. I think our sensors are just too sensitive. Now I'm almost scared to cook another steak.

That being said, it was a pretty damn good steak--worth the scrambling around trying to deactivate the alarms. I found some Prime New York steaks from Ralph's that were absolutely amazing. The even marbling on these bright red steaks were beautiful--and at such a reasonable price. Only $6 per steak! You can't beat that.

To go with the steaks, I made a tasty red wine, mushroom reduction. I'll be honest, I used a Two Buck Chuck Merlot from Trader Joe's for this, but trust me, it worked out just fine. The wine turned the mushrooms into an intense purple color. They bore a striking resemblance to kalamata olives...

IMG_3382

Red Wine Mushrooms
1 shallot
1 clove of garlic
1 cup crimini mushrooms
1/2 cup red wine
1 tablespoon butter
salt
pepper

1. Melt 1/2 tablespoon butter in saucepan
2. Add minced shallots, garlic, and sliced crimini mushrooms
3. Salt and pepper the mushrooms
4. Add red wine and let it reduce
5. Finish the sauce with the other 1/2 tablespoon of butter

Medium Rare New York Steak
1-inch thick New York steaks, at room temperature
coarse sea salt
freshly-cracked black pepper

1. Salt and pepper both sides of the steak
2. Sear in a nonstick skillet without any oil for 5 minutes on each side, 10 minutes total
3. Remove from pan and let rest for 5 minutes to allow juices to redistribute
4. Slice and marvel at the gorgeous medium rare pink color
*This is now my fool-proof method for medium rare steaks. I surprised myself with how well they turned out. The 5 minute rule is great! Trust me.

IMG_3440
I have to confess: I am currently having a shameless affair with fennel--and I mean the bulbous kind of fennel. I may or may not have made a trek to Ralph's today just for a single bulb of fennel. I've been making this simple apple fennel slaw with just thinly sliced fennel, apples, lemon juice, salt, and pepper and going through a bulb a day. Today, I added it to my leftover-steak sandwich on deliciously toasty ciabatta bread from the BreadBar in Century City with some sliced Campari tomatoes on the vine and crumbly French sheep's milk feta. It was ridiculously good for being leftovers.

IMG_3433IMG_3435IMG_3436

Thursday, July 8, 2010

Matcha Macarons with Adzuki Bean Filling

Whenever I'm at home in Fresno, I'm in the kitchen more than sitting in front of my laptop. It seems that when I have a kitchen and stand mixer at my disposal, my blogging suffers.

Within the past month I think I've made different flavored macarons at least 10 times, ironically failed at lemon bars twice, finally succeeded at strawberry lemon bars, found my love for almond meal in flour-less chocolate tortes, lemon ricotta cupcakes, caramelized chocolate almonds candies, earl grey and lemon madeleines...

Needless to say, I've got pictures and recipes of everything I've made. Sadly, I just haven't had the time to put anything up. Do I blog about the macarons I just made? Or do I jump back in the kitchen to start on those madeleines? I'd been choosing the kitchen.

However, I am now in Taipei--kitchen-less and without my trusty stand mixer. I'm sure a lot more of my time here will be spent eating out and blogging. Of course I'll soon be blogging about all the amazing meals I'm having here in Taipei, but first, I want to share some of my own creations.

IMG_5550
These matcha (green tea) macarons are something I'm particularly proud of. I love the beautiful green color the matcha powder gives to the macaron shells. Although I still followed the basic macaron recipe I've alway used, the slightly bitter matcha powder actually helped to tone down the sweetness a little.

IMG_5547
For the filling, I first made an adzuki (red bean) buttercream frosting. I added canned adzuki bean paste to a recipe of swiss meringue buttercream, which was delicious, but a little too sweet for my taste. Thus, for my second batch, I made an adzuki cream cheese filling instead. This was much better balanced--with the slightly tart flavor of cream cheese mellowing out the cloying sweetness of the red bean paste. Finally, a successful combination!

IMG_5551

Matcha Macarons with Adzuki Bean Filling
macaron shell recipe adapted from Tartlette

matcha macaron shells
200 g powdered sugar
110 g blanched, slivered almonds
1 tbsp high-quality matcha powder
90 g aged egg whites (about three eggs)
30 g fine granulated sugar

adzuki bean filling
4 oz cream cheese, room temperature
2 oz unsalted butter, room temperature
1 cup powdered sugar, sifted
1 can adzuki bean paste (can be found at Japanese grocery stores, i.c. Nijiya Market)

for the filling

1. In a stand mixer with a paddle attachment, cream softened butter and cream cheese for at least 3 minutes until light and fluffy

2. Slowly add in sifted powdered sugar, mixing well between each addition

3. Fold the can of adzuki bean paste into the cream cheese mixture

4. The filling is now ready to be piped on to the cooled macaron shells

for the macaron shells

1. weigh out the blanched almonds, matcha powder, and powdered sugar

2. grind together in food processor in batches and sift into a bowl--regrind any of the larger pieces left behind until you have a very fine powder

3. weigh out aged egg whites and granulated sugar

4. place egg whites in the bowl of an electric mixer fitted with the whisk attachment and begin whisking on high, gradually adding the granulated sugar little by little until you form a stiff meringue

5. fold the dry ingredients into the meringue in two installments. Fold until the ingredients are just mixed in, and you can no longer distinguish meringue from dry ingredients--until there are no noticeable streaks of white or green

6. place batter into a piping bag (large ziploc bag) fitted with a 1/2 inch tip

7. pipe batter onto silicon lined baking sheets in 1 1/2 inch rounds, giving them plenty of space to spread

8. let sit for 20 minutes

9. bake in 300F convection oven for about 15-20 minutes depending on your oven

10. let cool on baking sheets and once cooled, fill with adzuki filling and refrigerate


IMG_5533
Couldn't resist--had to take a bite :)


IMG_6469
Macarons from the second batch with adzuki cream cheese filling


IMG_6478
Valrhona chocolate macarons and matcha macarons

Sunday, May 23, 2010

Mother's Day 2010

Two weekends ago, I went home to surprise my mom for Mother's Day. It's difficult shopping for a present for your mom, so I figured the best thing I could do for her was cook her a nice meal. My mom requested food with Thai flavors so I drew some inspiration from Thai food that I've had recently in LA. I can't claim that these are authentic Thai dishes--in fact, they may be far from it--so I will just call them "Thai-Inspired."

I started planning the menu two days before Mother's Day and it only took me an afternoon of prep work to put out this "four-course" dinner on Sunday for my mom, my brother, and myself. Thankfully, everything worked out and as far as I could tell, my mom enjoyed everything. Although she is my mom so she might be a little biased ;) I will say one thing though--it's nearly impossibly to cook and sit down to eat at the same time.

Mother's Day 2010
Thai-Inspired Menu

IMG_3671IMG_3674
Red Curry Mussels
New Zealand Green-Lipped Mussels, Red Curry, Coconut

Our local Whole Foods always has beautiful mussels, and if my mom and I see them when we go grocery shopping, we have to buy some. Usually I do them in a simple lemongrass broth, but this time I wanted to do something different and a little spicy. I added some red curry paste to the fish stock I made earlier that day, and it created the perfect broth for the mussels. It was definitely a nice spicy appetizer.


IMG_3688IMG_3685
Thai Beef Salad
Grilled Flank Steak, Cucumber, Carrot, Red Onion, Cherry Tomatoes, Cabbage, Cilantro, Chili Lime Garlic Dressing

I drew inspiration from Jitlada for this salad. I remembered seeing a Jitlada recipe online for a Thai Beef Salad and I adapted the recipe for this dish. I marinated the flank steak in a mixture of oyster sauce, soy sauce, brown sugar, and black pepper before grilling it to medium rare. A salad of fresh vegetables dressed in a spicy dressing of mortar-and-pestled garlic and chili, fish sauce, lime and honey provided the perfect complement to the slices of steak. I soaked the raw red onions in cold water to make them milder, created strips of carrot with a peeler, and cut half-moons of a seeded cucumber. It was nice and light--a salad that would be perfect for summer.


IMG_3699IMG_3710
Seafood Tom Yum
Lobster, Shrimp, Halibut, Oyster Mushrooms, Shiitake Mushrooms, with Lemongrass, Lime, Ginger, Cilantro, Roasted Red Chili Paste

For this soup, I drew inspiration from a recent trip to Nakkara. I decided to pour the soup into the bowl tableside just like they did at the restaurant. I cooked each protein individually in the broth because of their different cooking times. I made a fish stock earlier in the day out of halibut bones I got from Whole Foods for $0.99/lb. I flavored the stock with some Thai flavors, and I think it turned out pretty well for my first try at Tom Yum soup although next time, I might add a little more acidity.


IMG_3717
Chocolate Molleux
Valhrona Guanaja Chocolate, Coconut Chantilly

Finally, a chocolate dessert. My mom's favorite desserts always involve chocolate so this was perfect. It really doesn't get any more chocolate-y than this. Using high quality Valhrona chocolate made this molten chocolate cake even more indulgent. It was my first time using this Jean-Georges Vongerichten recipe, and it worked pretty well. However, next time I would bake them just a little while longer--they were still a little too unset. Not a problem though--it just made them more "molten."


IMG_3678
Minnie wanted a bite too ;)

Friday, May 21, 2010

French Breakfast Radish Tartines

When I was younger, I used to tend to a little vegetable garden in our backyard. I was pretty successful and would always have tender sugar snap peas to harvest during winter and juicy cherry tomatoes during the summer. I would also grow radishes. They were easy to tend to--they didn't have tendrils or vines to support with cumbersome structures--and it was fun plucking them out of the dirt. However, I used to only be able to appreciate radishes for their beauty. I would bring in bunches of bright pink radishes and no one in our family would eat them. I didn't enjoy the spicy flavor of radishes, and we had absolutely no idea what to do with them.

IMG_3543

Almost 10 years later, I have finally discovered my love for the flavor of radishes. I still find them to be one of the most visually appealing vegetables, but now I can gladly give into the lure of vibrantly colored radishes. These radish tartines (open-faced sandwiches) are perfect for tea time. Dainty and beautiful, they elegant yet incredibly easy to assemble. And they're très français ;) My mom and I enjoyed them with some wine between lunch and dinner. It was lovely.

IMG_3537

A thin slice of whole grain bread from La Brea, some good french butter, a sprinkling of coarse sea salt and chopped parsley is all you need to complement these beautiful French breakfast radishes. The slices of radishes provide a peppery kick and satisfying crunch that is refreshing and addicting. Next time I plan on making an herb butter to bring an extra layer of flavor.

French Breakfast Radish Tartines

1 bunch French breakfast radishes
1 loaf whole grain La Bread bread
french unsalted butter, room temperature
coarse sea salt
parsley

1. cut bread into 1/2 inch slices (I didn't toast the bread)

2. slice radishes as thinly as possible

3. spread a layer of butter on the bread and arrange the radish slices on top

4. sprinkle with coarse sea salt and chopped parsley

5. enjoy with a cool glass of white wine

IMG_3542

It's amazing how something so simple can have such delicious flavors.