Thursday, January 21, 2010

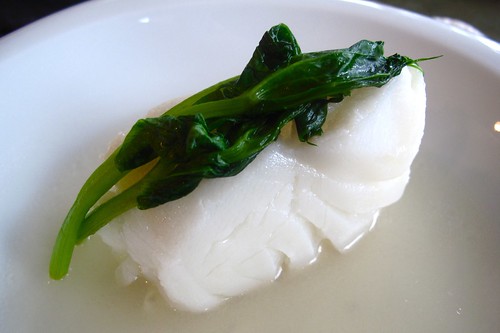
Chilean Sea Bass with Pea Tendrils


IMG_0249


I had leftover broth from the mussels I made the day before. The broth was too delicious to just pour down the drain. I had just enough to cover a beautiful fillet of chilean sea bass. Into a saute pan it went. After bringing the broth up to a simmer, I placed the 7 oz piece of fish in the pan and let it cook for 7 minutes--one minute per ounce. Simply poaching the sea bass in such a delicate broth resulted in a pure, untainted piece of gorgeous fish. There was nothing to mask its fresh sweetness.


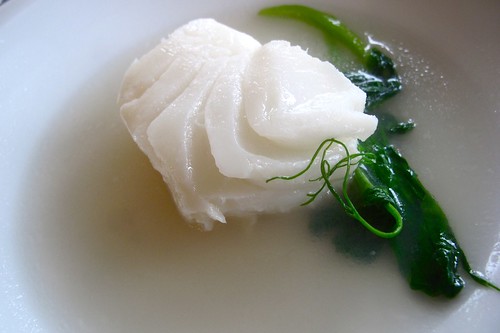
IMG_0251

I paired it with some young, tender pea tendrils that were simply sauteed with some garlic and salt. Simple perfection.

Wednesday, January 20, 2010

Green-Lipped Mussels


On this rainy day, I have nothing to do but contemplate the female sexuality. I am trapped in a room with no kitchen and only Sleeping Beauty and Prince Tristan and a collection of lusty poems from my English class.

Yet in the end, my thoughts return to food.
The stiff, proud stalk of an asparagus,
the erotically-shaped, briny muscle hidden inside the hard shell of an oyster,
the creamy texture of an avocado coating the tongue.

Food is sensual.


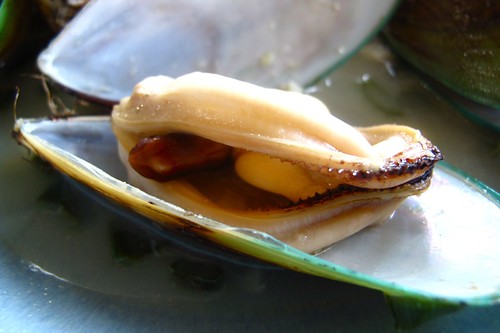
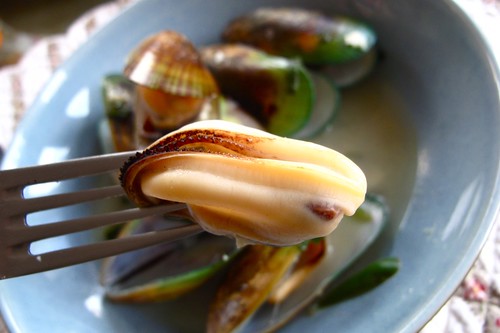
IMG_0196

This deliciously inviting mussel resembles another muscle...no?


Lemongrass Green Mussels

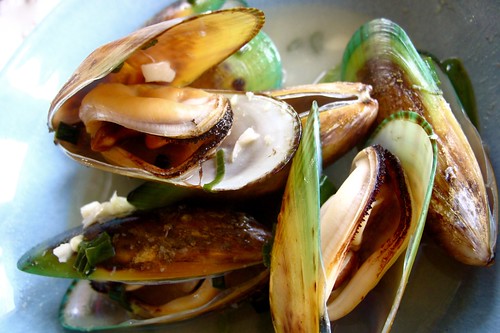
IMG_0186

2 pounds green-lipped mussels

1 can fish stock or clam stock
2 cups water
1 stalk lemongrass
1 shallot
1 lime (zest and juice)
1 tablespoon rice wine vinegar
1 tablespoon sugar (or piece of rock sugar)
1 teaspoon salt
1 inch nub of fresh ginger

1 tablespoon of sesame oil
2 clove garlic
3 stalks green onion (only green part)
1 serrano pepper
1 teaspoon grated fresh ginger
salt

I love green-lipped mussels. They're so much meatier and tastier than the smaller P.E.I. mussels. Every time I see them at Whole Foods, I buy every last green-lipped mussel they have. This is my favorite way of preparing them. The Thai-inspired broth is deliciously lemony and fresh with a spicy heat from the serrano pepper.

1. Cut the stalk of lemongrass into pieces, dice the shallot, zest and juice the lime, and cut ginger into large slices. Combine with fish stock, water, rice wine vinegar, salt, and sugar. Bring to boil and reduce by a third.

2. While the broth is reducing, clean and de-beard the mussels.

3. Strain the reduce broth through a sieve and reserve.

4. In a large pot, saute minced garlic, sliced serrano pepper, and grated ginger in the sesame oil. Add the mussels to the pot with some salt. Transfer some of the broth to the pot with the mussels. Add enough to cover the mussels only halfway. Cover and let the mussels cook until they open.

5. Plate in a shallow bowl along with some broth and enjoy with someone you love.

IMG_0192

Thursday, January 14, 2010

Roasted Butternut Squash Salad

Butternut squash are a real pain-in-the-ass to peel.

They look innocent enough--with their pale orange skin and cute oblong shape. But damn, that skin is thick! However, once you manage to fight your way through the skin, I have learned that you will be rewarded with a beautiful, bright, orange flesh that becomes so tender and sweet once you cook it.

This was my first time cooking butternut squash, and I decided to just cube the flesh and roast it in the oven with a little olive oil, salt, and pepper. Sprinkle over a nice bed of romaine--or even better, peppery, spicy arugula--and you have yourself a colorful, filling salad.


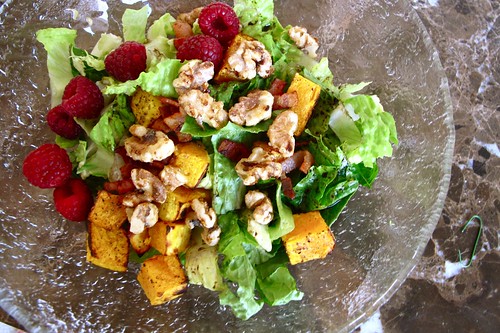
IMG_9968


Roasted Butternut Squash Salad
with balsamic vinaigrette , candied walnuts, applewood smoked bacon, and fresh raspberries

I don't have exact measures for the ingredients. It all kind of depends on how much salad you're making and the amount of toppings you prefer. I just came up with this combination based on what I had on hand. I lightly roasted the walnuts in a small non-stick skillet with a sprinkling of sugar. This resulted in a warm toasty nut that wasn't coated with an obscene amount of sugar. However, the salty, crunchy bacon made all the difference! It provided a really nice contrast to the sweet, soft butternut squash.

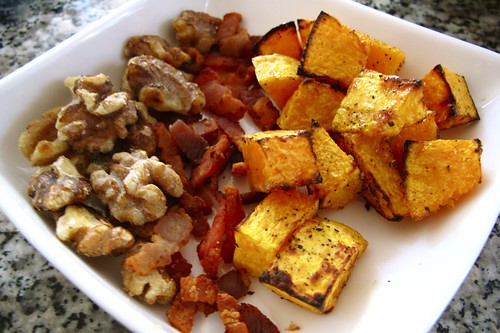
IMG_9970

My beautiful toppings, waiting to be scattered across a bed of lettuce. The balsamic dressing I used was also very simple--just a quick whisking of balsamic vinegar and olive oil.


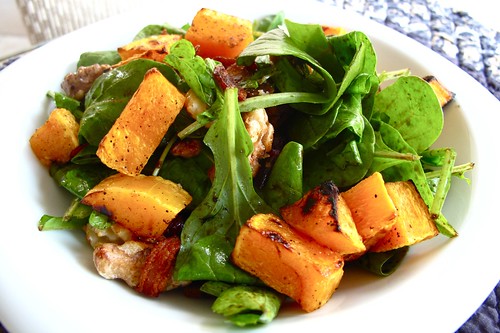
IMG_0077

Definitely try this salad with arugula. It is the perfect combination!

Wednesday, January 13, 2010

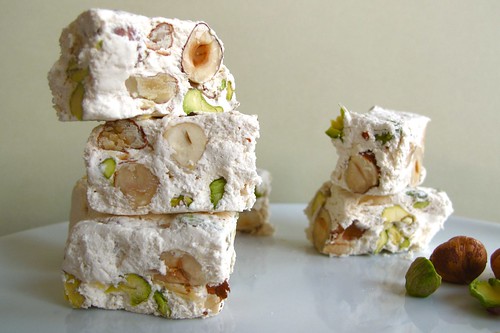
Hazelnut Pistachio Nougat

I think I've mentioned before my weakness for sweets involving the whipping of egg whites and sugar. This includes: meringues, macarons, and nougats. Three of my biggest loves.

Meringues were the first thing I attempted to make when I got an electric hand mixer. After that, macarons became my obsession. Recently, the gastronomic world has also become macaron-obsessed. Nougats...not so much.

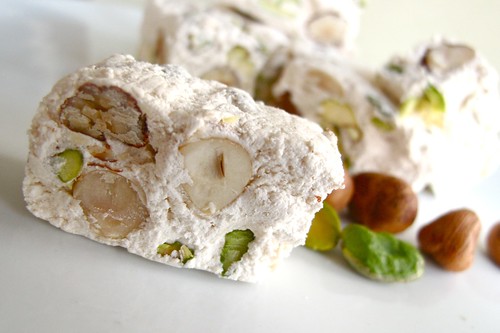
Therefore, when I stumbled across a nougat recipe a few week ago, I became determined to give it a try. Halfway through the process I wasn't sure if I would end up with actually nougats. I was staring at a messy, sticky, sickly honey-scented glob in a bowl. In the end, with patience and constant stirring over a double broiler, I was rewarded with pillowy, chewy, pieces of nutty satisfaction. YUM.

However, word of caution: only attempt to make these if you truly love nougats. It is well worth the process but the sticky mess was a bit of a hassle to clean up!

IMG_9843

Hazelnut Pistachio Nougat

2 egg whites
1 pinch of salt
150 ml of water
120 ml (175 g) honey
2 1/2 cups (500 g) sugar
1 tablespoon vanilla extract
1 cup (150 g) pistachios and hazelnuts, roasted

1. Line a 9 x 13 brownie pan with plastic wrap. Let the plastic wrap overflow on each side.

2. In a saucepan, heat honey, sugar, and water until it reaches 289 degrees F or 143 degrees C on a candy thermometer.

3. Meanwhile, beat egg whites with salt until frothy. Gradually add a tablespoon of sugar taken from the original quantity to help the egg whites become stiff.

4. With the mixer on medium, slowly pour in the syrup once it has reached the correct temperature.

5. Add vanilla extract and continue beating on high for about a minute.

6. Transfer the mixture into a double broiler and "dry" the mixture on low heat while stirring with a wooden spoon. Once the mixture comes off the bottom of the bowl, it is "dry" enough and the ideal temperature has been reached. Remove from heat.

7. Stir in pistachios and hazelnuts.

8. Transfer the mixture into the plastic wrap lined pan and spread into an even layer. Fold the extra plastic wrap over the top of the mixture.

9. Use a heavy textbook to weigh down the nougat as it cools to room temperature.

10. Cut into pieces with an oiled knife. The nougat will keep for 3 months.

IMG_9836

Voila! Delicious fresh homemade nougat!