Thursday, January 14, 2010

Roasted Butternut Squash Salad

Butternut squash are a real pain-in-the-ass to peel.

They look innocent enough--with their pale orange skin and cute oblong shape. But damn, that skin is thick! However, once you manage to fight your way through the skin, I have learned that you will be rewarded with a beautiful, bright, orange flesh that becomes so tender and sweet once you cook it.

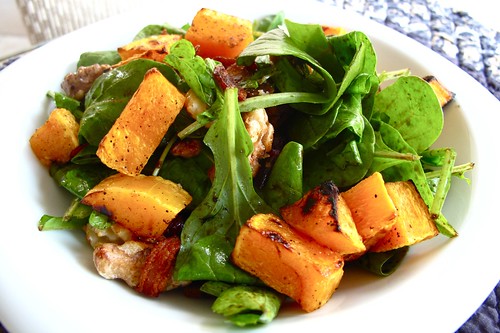
This was my first time cooking butternut squash, and I decided to just cube the flesh and roast it in the oven with a little olive oil, salt, and pepper. Sprinkle over a nice bed of romaine--or even better, peppery, spicy arugula--and you have yourself a colorful, filling salad.

IMG_9968


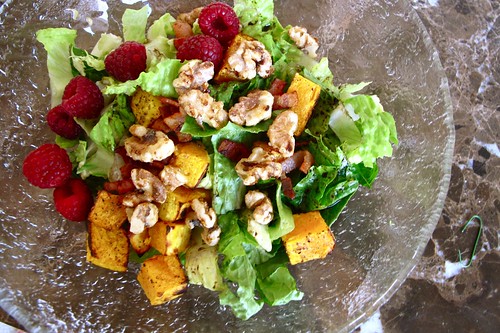
Roasted Butternut Squash Salad
with balsamic vinaigrette , candied walnuts, applewood smoked bacon, and fresh raspberries

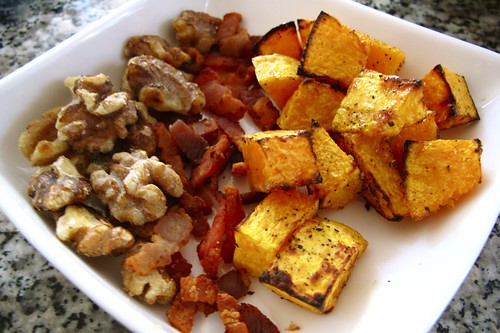
I don't have exact measures for the ingredients. It all kind of depends on how much salad you're making and the amount of toppings you prefer. I just came up with this combination based on what I had on hand. I lightly roasted the walnuts in a small non-stick skillet with a sprinkling of sugar. This resulted in a warm toasty nut that wasn't coated with an obscene amount of sugar. However, the salty, crunchy bacon made all the difference! It provided a really nice contrast to the sweet, soft butternut squash.
IMG_9970

My beautiful toppings, waiting to be scattered across a bed of lettuce. The balsamic dressing I used was also very simple--just a quick whisking of balsamic vinegar and olive oil.

IMG_0077

Definitely try this salad with arugula. It is the perfect combination!

Wednesday, January 13, 2010

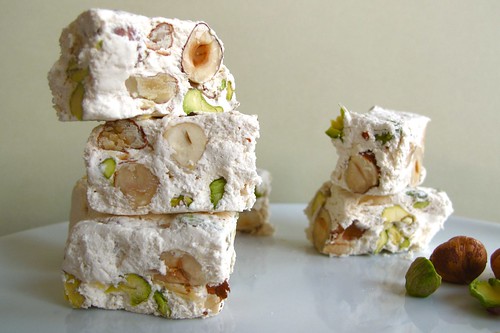
Hazelnut Pistachio Nougat

I think I've mentioned before my weakness for sweets involving the whipping of egg whites and sugar. This includes: meringues, macarons, and nougats. Three of my biggest loves.

Meringues were the first thing I attempted to make when I got an electric hand mixer. After that, macarons became my obsession. Recently, the gastronomic world has also become macaron-obsessed. Nougats...not so much.

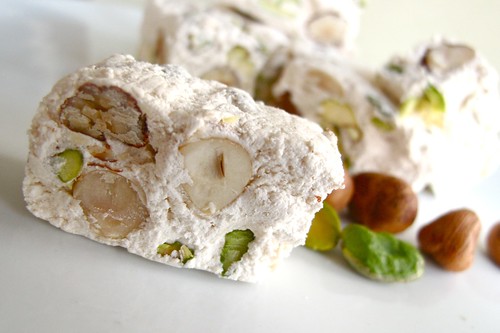
Therefore, when I stumbled across a nougat recipe a few week ago, I became determined to give it a try. Halfway through the process I wasn't sure if I would end up with actually nougats. I was staring at a messy, sticky, sickly honey-scented glob in a bowl. In the end, with patience and constant stirring over a double broiler, I was rewarded with pillowy, chewy, pieces of nutty satisfaction. YUM.

However, word of caution: only attempt to make these if you truly love nougats. It is well worth the process but the sticky mess was a bit of a hassle to clean up!

IMG_9843

Hazelnut Pistachio Nougat

2 egg whites
1 pinch of salt
150 ml of water
120 ml (175 g) honey
2 1/2 cups (500 g) sugar
1 tablespoon vanilla extract
1 cup (150 g) pistachios and hazelnuts, roasted

1. Line a 9 x 13 brownie pan with plastic wrap. Let the plastic wrap overflow on each side.

2. In a saucepan, heat honey, sugar, and water until it reaches 289 degrees F or 143 degrees C on a candy thermometer.

3. Meanwhile, beat egg whites with salt until frothy. Gradually add a tablespoon of sugar taken from the original quantity to help the egg whites become stiff.

4. With the mixer on medium, slowly pour in the syrup once it has reached the correct temperature.

5. Add vanilla extract and continue beating on high for about a minute.

6. Transfer the mixture into a double broiler and "dry" the mixture on low heat while stirring with a wooden spoon. Once the mixture comes off the bottom of the bowl, it is "dry" enough and the ideal temperature has been reached. Remove from heat.

7. Stir in pistachios and hazelnuts.

8. Transfer the mixture into the plastic wrap lined pan and spread into an even layer. Fold the extra plastic wrap over the top of the mixture.

9. Use a heavy textbook to weigh down the nougat as it cools to room temperature.

10. Cut into pieces with an oiled knife. The nougat will keep for 3 months.

IMG_9836

Voila! Delicious fresh homemade nougat!

Sunday, January 10, 2010

Freshly Extruded Pasta with Ragu Bolognese

For my 18th birthday two years ago, I received a beautiful shiny red Kitchen Aid stand mixer. That stand mixer symbolizes the start of my culinary obsession.

For my 20th birthday this year, my mom surprised me with the new (and expensive) Kitchen Aid Stand Mixer Pasta Press Attachment. Anyone who knows what that is is probably incredibly jealous right now. Heck, I was jealous of myself. I had only dreamed about having the standard pasta attachment. Never in my wildest dreams did I imagine I would be the owner of one of Kitchen Aid's newest attachment.

This attachment extrudes pasta. The excitement of watching the pasta dough squeeze out in cute little shapes is indescribable. Even after having already extruded fresh pasta a good five times, it was still just as exciting to watch as the first time.

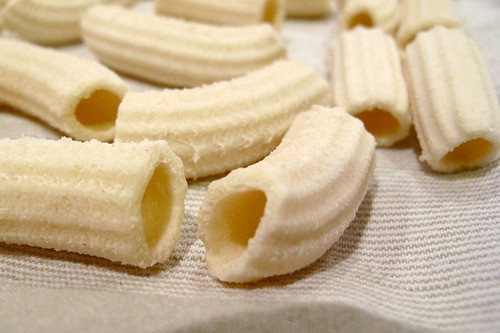
The extruded fresh pasta is not only fun to make but also has an amazing texture. Cooked al dente, the pasta is doughy and pleasantly toothsome. Being extruded means that the pasta has little ridges (see in picture below) and a rough texture. This texture helps the pasta hold onto the sauce. It's absolutely amazing and perfect. Fresh pasta is amazing!


IMG_9857

Dough for Extruded Pasta

5 oz all purpose flour
5 oz semolina flour
4 fluid ounces warm water

I weighed out flour and placed it in the bowl of my stand mixer fitted with the paddle attachment. I turned the mixer on low and slowly dribbled in the water. Don't add the water all at once. The goal is for the dough to remain only slightly wet and crumbly. If it comes together into a ball, it will be too wet and become difficult to extrude.

Feed the dough piece by piece into the attachment and watch in wonder as it extrudes out in cute little shapes!

I wish I had taken a picture of the process and of the attachment itself. It really is a beautiful attachment and the pasta is so much fun to make.

Let the pieces of pasta dry for at least 30 minutes or until the pasta feels hard. To cook, boil in water with salt and olive oil as you would with boxed pasta. The amount of time it takes to cook depends on the shape and size and dryness of the fresh pasta.


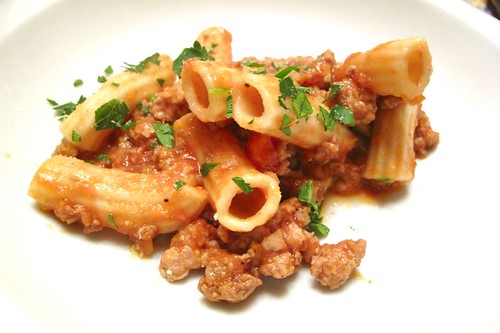
I then figured that the best sauce for the freshly extruded rigatoni I had just made would be a nice bolognese. So...I made some :)

Ragu Bolognese
recipe adapted from Mario Batali

5 tablespoons extra-virgin olive oil
1 carrot, finely chopped
1 medium onion diced
1 rib of celery
1 clove of garlic
red pepper flakes

1 pound lean ground beef
1 pound ground pork
1/4 pound chopped bacon
1/2 pound spicy italian sausage

1 small can of tomato paste
1 cup of milk
1 cup of dry white wine
sea salt and pepper to taste

Heat olive oil over medium heat. Place vegetables in a food processor and process until very finely chopped but not pureed. Add to saucepan and sweat over medium heat until vegetables are soft and translucent but not browned--about 10-15 minutes.

Add the beef, pork, bacon, and sausage over high heat. Keep stirring until the meat is cooked through but not browned. This helps give the sauce a creamy texture later on. Add the tomato paste, milk and white wine. Simmer over medium-low heat for 1 to 2 hours. Season with salt and pepper, to taste, and remove from heat.

When ready to use, cooked pasta should be added to a saucepan with the appropriate amount of hot ragu bolognese. This is an important step. It gives the pasta a chance to absorb some of the sauce and become evenly coated by the bolognese.

Garnish with chopped parsley and Parmigiano-Reggiano.


IMG_9938j

Friday, January 8, 2010

Black Sesame Macarons


IMG_0092


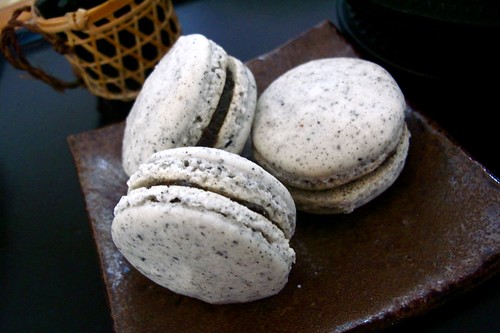
I have always loved the flavor of black sesame. I love the black sesame soup you can get at Chinese restaurants. I love black sesame filled mochi. So when I stumbled across a can of black sesame paste earlier this year at a Chinese market, I knew it would make the perfect filling for some black sesame macarons. One of my favorite flavors in my favorite French confections! What could be better?

When making macarons, it is incredibly important to measure out the ingredients by weight. Slight variations in the weight of the ingredients could result in hideous macarons--I speak from experience. There have been many time where I thought I was making macarons, but what came out of the oven looked like nothing like them. Luckily, I think I've got it down now :)


Sesame Macarons

recipe adapted from Tartlette
makes around 30-40 macarons

90 grams egg whites (about three)
30 grams granulated sugar
200 grams powdered sugar
95 grams ground almonds
15 grams ground black sesame seeds


I always start the process by aging my egg whites on the kitchen counter two days before I plan to make macarons. My mom believes that letting egg whites sit at room temperature for more than an hour is a questionable procedure but it really makes all the difference when it comes to making macarons! Besides, I've never heard of anyone getting sick as a result of aged egg whites in macarons.

For these macarons, I combined blanched almond slivers and black sesame seeds in a food processor with some of the powdered sugar until it turns into a fine flour. I then combine that mixture with the rest of the powdered sugar.

To make the meringue, whip the egg whites until frothy and add the granulated sugar in little by little until it forms stiff peaks.

The next part can be very temperamental. I fold the meringue into the almond mixture in two parts using a spatula. The best description I can give for the consistency you want to obtain is the consistency of lava. Really--molten lava. Don't be afraid of folding it. Granted, over-folding could prove disastrous but don't be intimidated. The mixture does need some good folding until it reaches the perfect consistency. Another way to tell when the mixture is ready is to lift up your spatula and the batter should fall back down in a thick ribbon.

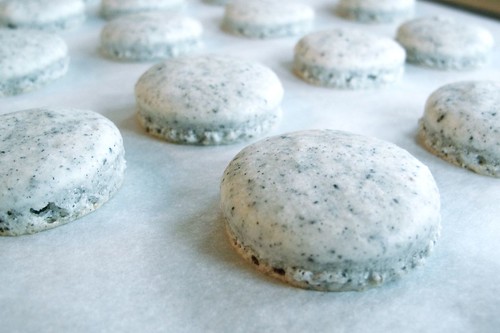
Line two baking sheets with silpat and pipe the batter into 1 inch rounds. The batter will spread a little so don't make them too big or too close together.

Preheat the oven to 280 degrees F.

It is also crucial to let the piped macarons shells sit out for a good 30 minutes, or until slightly hardened. This allows them to develop the coveted "feet" of the macaron.

IMG_9844

Bake for 15-20 minutes and hopefully you end up with perfect little macaron shells to fill with sesame paste!


IMG_0091

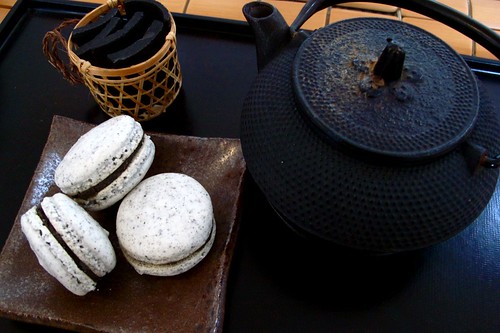
perfect with a cup of green tea!