Showing posts with label Macarons. Show all posts

Tuesday, November 30, 2010

Earl Grey Salted Caramel Macarons

IMG_4188
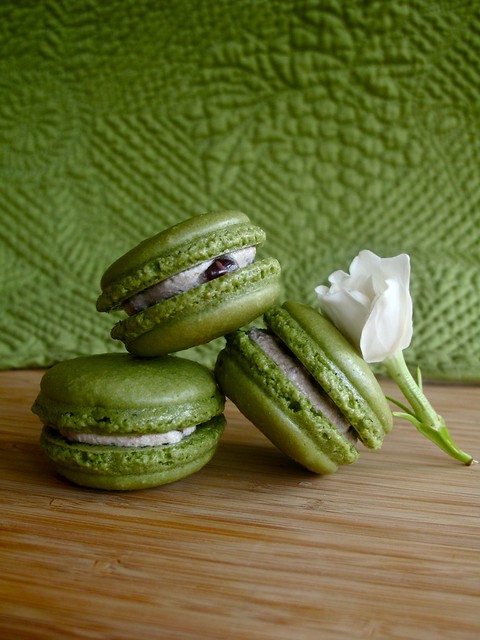
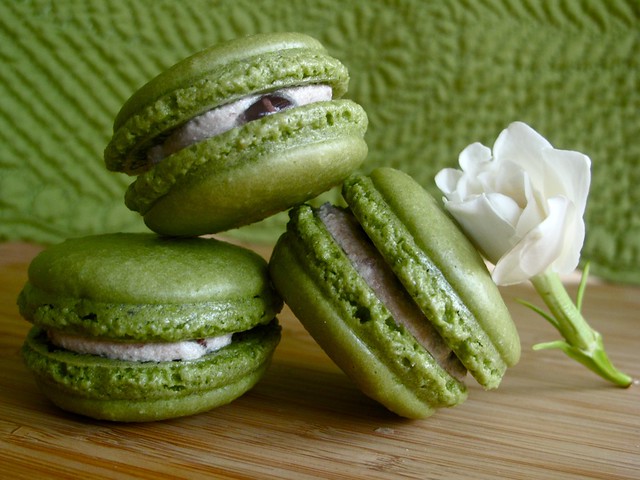
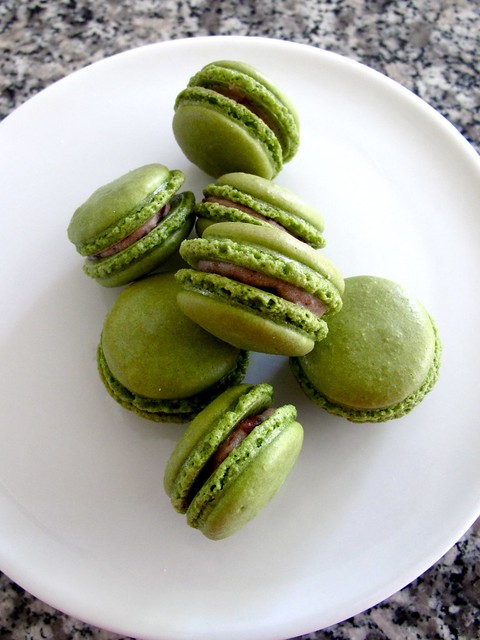
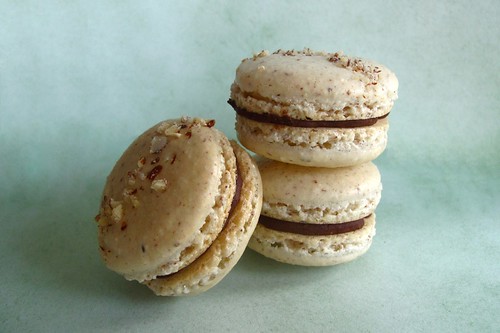
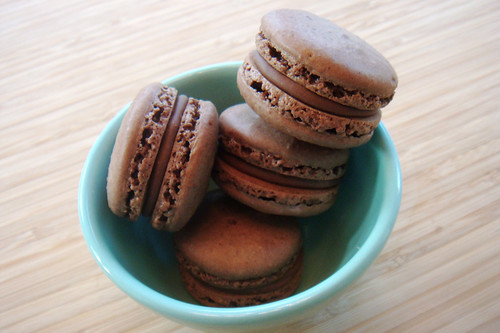
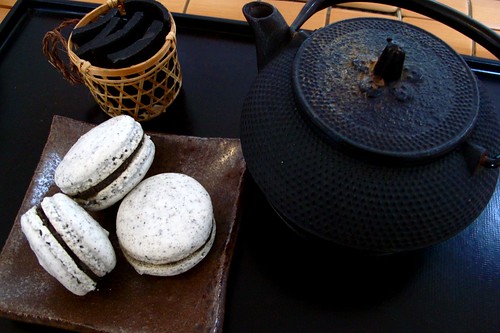
These are my new favorite macarons to make. The Earl Grey tea makes them wonderfully fragrant, and the salted caramel adds not only a great balance of salty and sweet, but also gives the macarons a little chewier texture than usual.

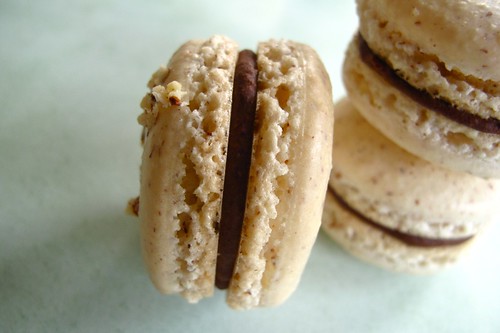
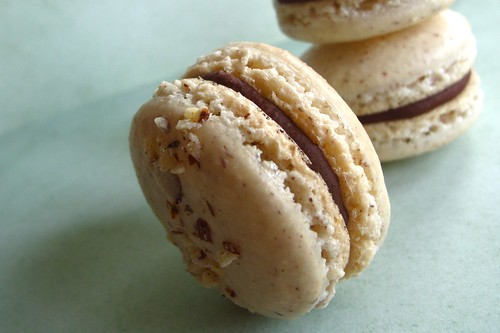
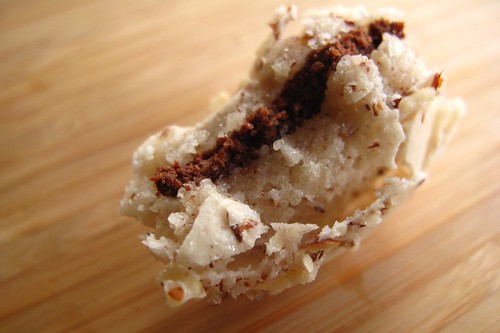
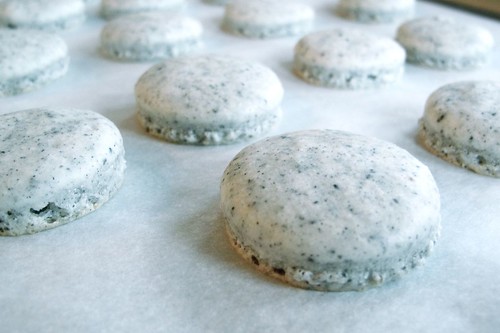
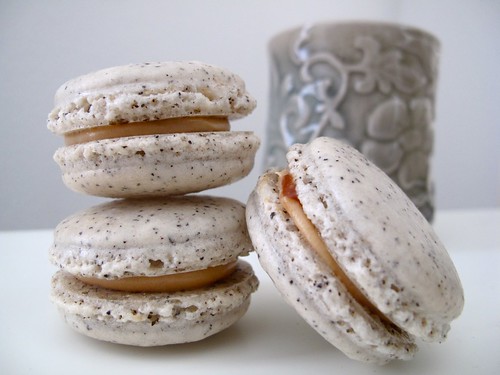
And when I say Earl Grey, I mean Earl Grey. There are little bits of tea leaf running through the shells, and the heavy cream used to make the caramel is infused with the tea itself.

IMG_4189
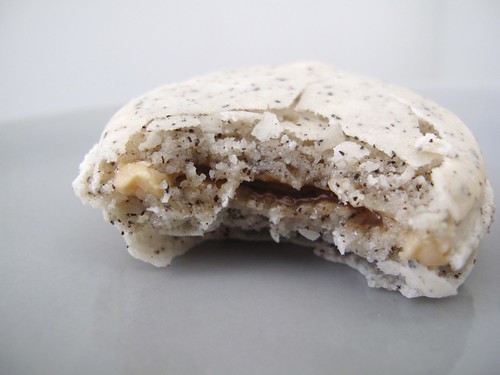
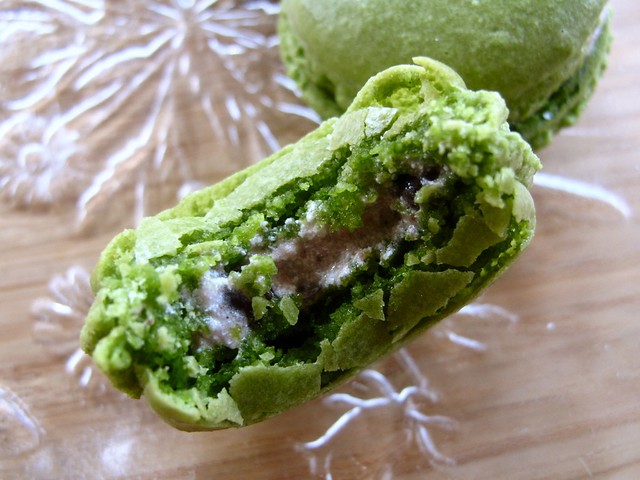
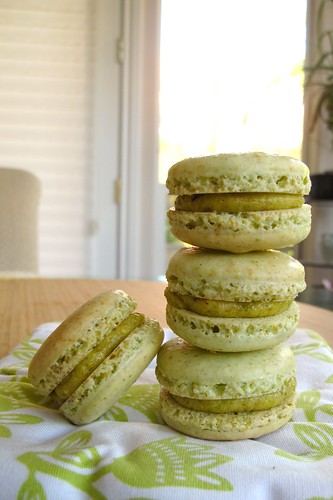
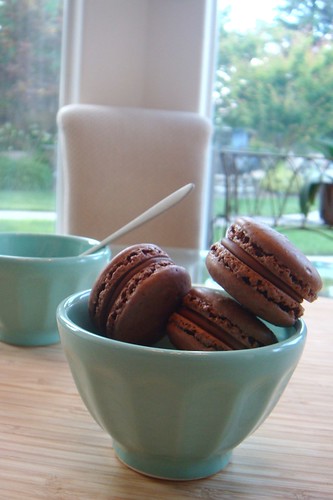
See the specks of tea leaves. Smell the intoxicating bergamot scent. And finally, taste the floral, chewy macaron. If you really wanted to go crazy, have them with a warm cup of Earl Grey tea.

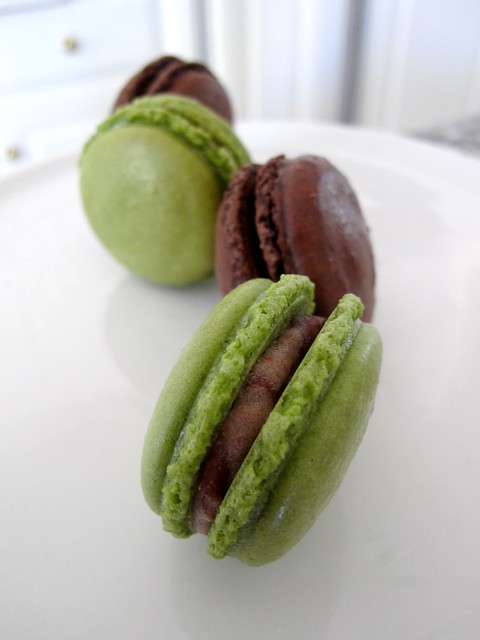
Even after months of not making any macarons, they were relatively cooperative and didn't really give me any trouble. I thought I would be a little rusty, but I think making macarons has become second nature to me. I experimented with the filling this time and did a combination of two different caramel fillings. In the center, I made a caramel that I softened with a little butter. Around the caramel center, I made a salted caramel cream cheese frosting to temper the sweetness of the caramel. Filling the delicate shells with only caramel would have been overwhelming.

Earl Grey Salted Caramel Macarons
makes 24 macarons

for the macarons shells:
110g blanched almond slivers
200g powdered sugar
90g aged egg whites
30g fine granulated sugar
2 tea bags Earl Grey tea ( I used Tazo)

As always, make sure to age the egg whites for at least 24 hours, preferably 48 hours. Weigh out the ingredients accurately. Combine 110g blanched almond slivers with 200g of powdered sugar with the tea leaves from 2 tea bags of Earl Grey tea. in a food processor. Process until very fine and sift into a bowl. Process any larger pieces left over.

In the bowl of a stand mixer, beat 90g of egg whites on high until frothy. Add in 30g of granulated sugar gradually, taking care to incorporate sugar well after each addition. Beat until relatively stiff peaks form. You should be able to invert the bowl and the meringue should stay in place.

Add half of the almond and powdered sugar mixture into the egg whites and gently fold to incorporate. Add the rest of the mixture and fold until the consistency of lava. Fold carefully. You would rather under-mix than over-mix the batter.

Pipe 1 inch rounds onto silpat lined baking sheets, giving them ample space because they will spread a little. Let them rest for 30 minutes or until the tops aren't sticky to the touch.

Heat a convection oven to 260 degrees F and bake for 20 minutes. Let cool on the baking sheets. I prefer to let them cool and "dry" out a little bit overnight before filling them the next day.

for the caramel:
1/4 cup heavy cream
1 Earl Grey tea bag
1/2 cup granulated sugar
1 tsp coarse fleur de sel
2 tbsp water
1 tbsp butter

Heat 1/4 cup of heavy cream with 1 Earl Grey tea bag. Let the tea infused until the heavy cream is a warm tan color.

Combine 1/2 cup of granulated sugar with 2 tbsp of water in a deep saucepan. Cook until a golden brown amber color. Watch the mixture carefully because it can burn in the blink of an eye.

Carefully add in the heavy cream mixture and turn off the heat. Be careful because the mixture will seize and bubble up when the cream is added. Don't panic. Just keep stirring and it will calm down. Add in 1 tbsp of butter and 1 tsp coarse fleur de sel. Make sure it is a quality sea salt. It makes all the difference.

Make two batches, one for the center of the filling, and one for the cream cheese filling.

for the salted caramel cream cheese filling:
1 batch of caramel sauce
4 oz unsalted butter, softened
4 oz cream cheese, softened
50g powdered sugar

In the bowl of a stand mixer fitted with a paddle attachment, combine 4 oz unsalted butter with 4 oz cream cheese. Beat until light and fluffy. Add in sugar and incorporate well. Add in 1 batch of caramel sauce, cooled almost to room temperature, and beat to incorporate.

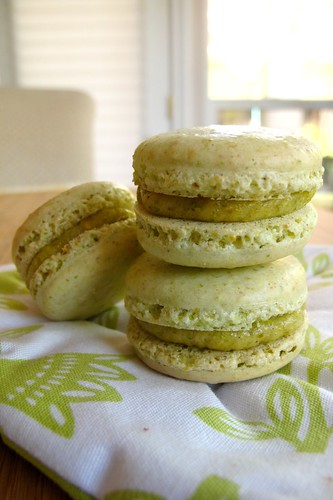
To fill the macarons, place a small amount of caramel in the center of a shell and encircle that caramel with the cream cheese mixture before topping it with a matching macaron shell. Place in refrigerator and let them "mature" overnight. Macarons will retain their optimal texture for about 3 days.

IMG_4185
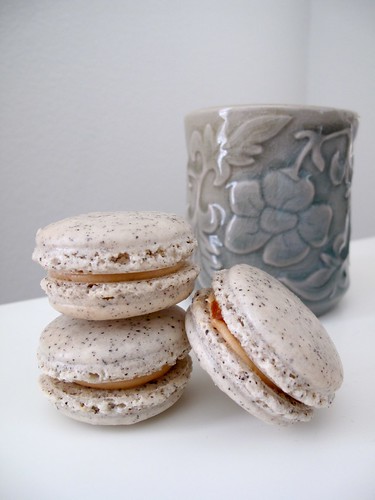
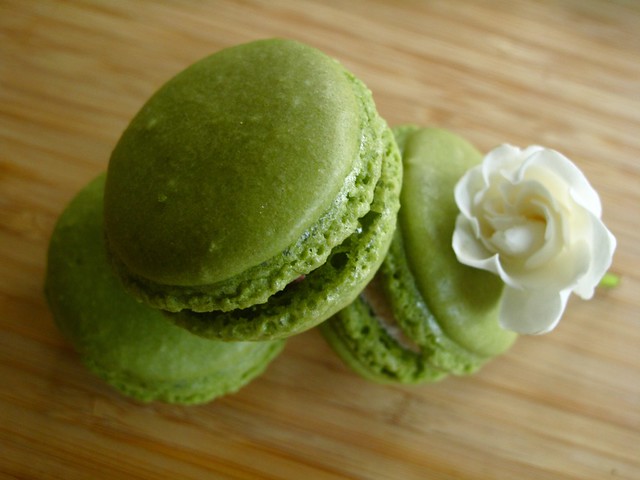
P.S. I also made that celadon-glazed ceramic piece in the background! :)
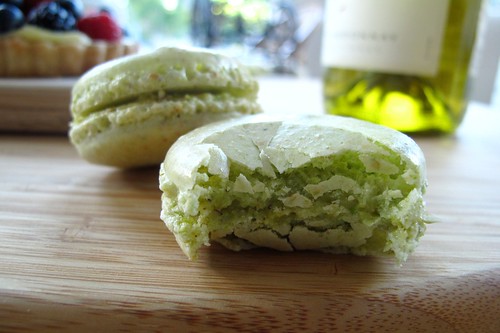
Thursday, July 8, 2010

Matcha Macarons with Adzuki Bean Filling

Whenever I'm at home in Fresno, I'm in the kitchen more than sitting in front of my laptop. It seems that when I have a kitchen and stand mixer at my disposal, my blogging suffers.

Within the past month I think I've made different flavored macarons at least 10 times, ironically failed at lemon bars twice, finally succeeded at strawberry lemon bars, found my love for almond meal in flour-less chocolate tortes, lemon ricotta cupcakes, caramelized chocolate almonds candies, earl grey and lemon madeleines...

Needless to say, I've got pictures and recipes of everything I've made. Sadly, I just haven't had the time to put anything up. Do I blog about the macarons I just made? Or do I jump back in the kitchen to start on those madeleines? I'd been choosing the kitchen.

However, I am now in Taipei--kitchen-less and without my trusty stand mixer. I'm sure a lot more of my time here will be spent eating out and blogging. Of course I'll soon be blogging about all the amazing meals I'm having here in Taipei, but first, I want to share some of my own creations.

IMG_5550
These matcha (green tea) macarons are something I'm particularly proud of. I love the beautiful green color the matcha powder gives to the macaron shells. Although I still followed the basic macaron recipe I've alway used, the slightly bitter matcha powder actually helped to tone down the sweetness a little.

IMG_5547
For the filling, I first made an adzuki (red bean) buttercream frosting. I added canned adzuki bean paste to a recipe of swiss meringue buttercream, which was delicious, but a little too sweet for my taste. Thus, for my second batch, I made an adzuki cream cheese filling instead. This was much better balanced--with the slightly tart flavor of cream cheese mellowing out the cloying sweetness of the red bean paste. Finally, a successful combination!

IMG_5551

Matcha Macarons with Adzuki Bean Filling
macaron shell recipe adapted from Tartlette

matcha macaron shells
200 g powdered sugar
110 g blanched, slivered almonds
1 tbsp high-quality matcha powder
90 g aged egg whites (about three eggs)
30 g fine granulated sugar

adzuki bean filling
4 oz cream cheese, room temperature
2 oz unsalted butter, room temperature
1 cup powdered sugar, sifted
1 can adzuki bean paste (can be found at Japanese grocery stores, i.c. Nijiya Market)

for the filling

1. In a stand mixer with a paddle attachment, cream softened butter and cream cheese for at least 3 minutes until light and fluffy

2. Slowly add in sifted powdered sugar, mixing well between each addition

3. Fold the can of adzuki bean paste into the cream cheese mixture

4. The filling is now ready to be piped on to the cooled macaron shells

for the macaron shells

1. weigh out the blanched almonds, matcha powder, and powdered sugar

2. grind together in food processor in batches and sift into a bowl--regrind any of the larger pieces left behind until you have a very fine powder

3. weigh out aged egg whites and granulated sugar

4. place egg whites in the bowl of an electric mixer fitted with the whisk attachment and begin whisking on high, gradually adding the granulated sugar little by little until you form a stiff meringue

5. fold the dry ingredients into the meringue in two installments. Fold until the ingredients are just mixed in, and you can no longer distinguish meringue from dry ingredients--until there are no noticeable streaks of white or green

6. place batter into a piping bag (large ziploc bag) fitted with a 1/2 inch tip

7. pipe batter onto silicon lined baking sheets in 1 1/2 inch rounds, giving them plenty of space to spread

8. let sit for 20 minutes

9. bake in 300F convection oven for about 15-20 minutes depending on your oven

10. let cool on baking sheets and once cooled, fill with adzuki filling and refrigerate


IMG_5533
Couldn't resist--had to take a bite :)


IMG_6469
Macarons from the second batch with adzuki cream cheese filling


IMG_6478
Valrhona chocolate macarons and matcha macarons

Thursday, May 13, 2010

Pistachio Frangipane Macarons

Lately, it seems as though the Macaron Gods have been smiling down on me. It seems I've got the temperamental macarons down pretty well now. I haven't have a failed or unsatisfactory batch in a pretty long time. After countless trays of misshapen, lopsided feet, deflated, or cracked macarons, I would say it's about time!

IMG_3624

Of course, now I've jinxed myself.

So I could attribute this great achievement to a sudden blessing from the gods, but more realistically, I would say there are logistical reasons for my success.

1) I still age my egg-whites. At least 24 hours. Preferably 48. I have gotten over my fear of un-refrigerated egg whites--after a few exquisite macarons, my mom has also gotten over her doubts.

2) I always WEIGH out all my ingredients on a kitchen scale. I see macaron recipes that call for ingredients by cups, tsp, tbsp, etc and I just cringe. They're just setting themselves up for disappointment and disaster.

3) I can now recognized exactly when to stop folding the batter. That probably helps a lot.

4) I still let the piped shells sit out for about 20 minutes, or until the batter is no longer sticky when you gently touch the top of a shell, before putting them in the oven.

5) I bake one tray at a time. I could probably get away with baking both trays at the same time, but I'm paranoid about which tray gets which oven rack.

6) I discovered our oven at home is a convection oven. I'm pretty embarrassed to say that although I've been using that same oven for over 5 years, I have just NOW discovered it's a convection oven. Using the convection bake function of my oven as allowed for more even heat distribution and has helped immensely with the development of beautiful feet on my macarons. I would say this is the most recent and most influential reason for my success.

7) Because my shells are coming out of the oven looking beautiful, I've started putting more thought into what I want to fill them with. Before, some would come out less than perfect, and I would get too discouraged to even come up with a great filling.

8) Letting them "mature" overnight in the refrigerator after filling the shells is also crucial. This allows the shells and the filling get to know each other, which leads to a texturally more satisfying and cohesive macaron.


I think that's all the newfound wisdom I have to bestow on anyone else who has a macaron obsession like me. I can't say I'm completely satisfied with the macarons I'm now producing, but I'm definitely getting closer. These Pistachio Frangipane Macarons are some of my latest creations. I accidentally piped them a little larger than I'd prefer but they were pretty tasty, if I do say so myself. The shell had a delicate, crisp outer crust that easily gave way to a chewy, moist interior filled with an intensely pistachio frangipane filling. However, it was still a little on the sweet side for me. I'm still waiting for the day when I'm brave enough to tweak macaron recipes a little more.

IMG_3615

Pistachio Frangipane Macarons
adapted from Tartlette and Zen Can Cook

pistachio macaron shells
90g aged egg whites (about three eggs)
30g fine granulated sugar
200g powdered sugar
55g blanched slivered almonds
55g pistachios, unsalted, shelled

pistachio frangipane filling
2oz unsalted butter, softened
1/4 cup sugar
1/4 cup blanched silvered almonds
1/2 cup pistachios, unsalted, shelled
1 egg
1 tbsp flour
*Just a warning, this filling includes the use of a raw egg. Usually frangipane fillings are baked into tarts and other pastries. I'm not sure how I feel about the raw egg in this filling, but it was delicious and my family and friends devoured this whole batch with no ill effects. I figure, people make mayonnaise with raw eggs anyways...*

IMG_3622

for the filling

1. Combine butter, sugar, almonds, pistachio, and egg in the food processor and pulsed together until it makes a paste.

2. Add flour in at the end and pulse to combined.

3. Refrigerate for at least an hour, but preferably over night


for the macaron shells

1. weigh out the blanched almonds, pistachios, and powdered sugar

2. grind together in food processor in batches and sift into a bowl--regrind any of the larger pieces left behind until you have a very fine powder

3. weigh out aged egg whites and granulated sugar

4. place egg whites in the bowl of an electric mixer fitted with the whisk attachment and begin whisking on high, gradually adding the granulated sugar little by little until you form a stiff meringue

5. fold the dry ingredients into the meringue in two installments. I wish I could tell you exactly when to stop folding, but this part really just takes experience. Fold until the ingredients are just mixed in and you can no longer distinguish meringue from dry ingredients--I guess the best description is still "molten lava"

6. pipe batter onto silicon lined baking sheets in 1 1/2 inch rounds, giving them plenty of space to spread

7. let sit for 20 minutes

8. bake in 250F convection oven for about 15-20 minutes depending on your oven

9. let cool on baking sheets and once cooled, fill with frangipane filling and refrigerate

10. devour.

IMG_3592

Tuesday, March 9, 2010

Hazelnut Praline Macarons

IMG_0595

One of my latest macaron creations were these Hazelnut Praline Macarons. I love the combination of hazelnuts with chocolate and I love macarons so this combination was an obvious success. The filling tasted a little like Nutella, yet with a delicious hint of caramelized sugar that comes with pralines.


IMG_0599


Chocolate Praline Filling
150 grams hazelnuts, roasted and skins removed
175 grams sugar
60 ml water
heavy cream
milk chocolate

1. Preheat oven to 275 degrees Fahrenheit

2. Spread hazelnuts evenly on a baking sheet and roast for 15 minutes, moving them around with a spatula halfway through

3. Cover roasted hazelnuts with a tea towel and let them steam and cool down for 10 minutes. Roll them around in the tea towel and the skins should come off easily--a little bit of skin left on them is fine. Transfer them to a baking sheet lined with silpat.

4. Combine sugar and water in a small saucepan over medium high heat until the sugar dissolves and turns a dark amber color. Watch this carefully because the sugar mixture can go from caramelized to burn in the blink of an eye. If using a candy thermometer, cooked until it reaches around 350 degrees. However, you can easily tell when it's done by the color of the sugar.

5. Pour the cooked sugar over the hazelnuts and let cool.

6. Once cool, break the sugar and hazelnuts into pieces and process in a food processor until finely ground.

7. Make a chocolate ganache by heating up heavy cream and pouring it over milk chocolate pieces--I eyed the amount so I apologize for not having an exact measurement.

8. Mix in some of the praline into the milk chocolate ganache and chill in refrigerator before filling shells.

IMG_0607


Hazelnut Praline Macarons

recipe adapted from Tartlette
makes around 30-40 macarons

90 grams egg whites (about three)
30 grams granulated sugar
200 grams powdered sugar
60 grams ground almonds
50 grams ground hazelnuts

1. Start by aging the egg whites on the kitchen counter at least 24 hours before you plan on making the macarons.

2. Weigh out the appropriate amounts of blanched almond silvers, raw hazelnuts, and powdered sugar. I left the skins on the hazelnuts and I think it made a nice speckled look for the shells.

3. Combine the nuts and powdered sugar in a food process and process until finely ground. Sift the mixture and regrind the pieces that are bigger.

4. Whip the egg whites until frothy and add the granulated sugar in little by little until it forms stiff peaks.

5. Fold the nut and sugar mixture into the meringue in two parts. Fold just until the mixture reaches the consistency of molten lava and falls back onto itself in thick ribbons. For me, this occurs almost as soon as the egg whites are no longer distinguishable.

6. Line two baking sheets with silpat and pipe the batter into 1 inch rounds. The batter will spread a little so don't make them too big or too close together. Decorate with chopped hazelnut pieces if desired.

7. Preheat the oven to 280 degrees F. Let the piped macaron shells sit on the counter for 30 minutes, or until the surfaces are dry.

8. Bake for 15-20 minutes

9. Fill the shells with the praline filling and let them "mature" in the refrigerator overnight to achieve the perfect macaron consistency.

10. Enjoy with a cup of coffee!

IMG_0621

Friday, February 5, 2010

Nutella Macarons

It's World Nutella Day!
Who doesn't love Nutella?
I thought I'd put up a picture of my Nutella macarons.
I simply made chocolate macarons and filled them with a Nutella ganache. If you're too lazy to make a ganache, just sandwiching the macarons together with pure Nutella would be delicious too!
I wish I had a few to munch on right now...

DSC01345_2

Chocolate Macarons with Nutella
recipe adapted from David Lebovitz

Macaron Batter
1 cup (100 gr) powdered sugar
½ cup powdered almonds (about 2 ounces, 50 gr, sliced almonds, pulverized)
3 tablespoons (25 gr) unsweetened Dutch-process cocoa powder
2 large egg whites, at room temperature
5 tablespoons (65 gr) granulated sugar
Preheat oven to 350º F (180º C).

Line two baking sheets with parchment paper and have a pastry bag with a plain tip (about 1/2-inch, 2 cm) ready.

Grind together the powdered sugar with the almond powder and cocoa so there are no lumps; use a blender or food processor since almond meal that you buy isn't quite fine enough.

In the bowl of a standing electric mixer, beat the egg whites until they begin to rise and hold their shape. While whipping, beat in the granulated sugar until very stiff and firm, about 2 minutes.

Carefully fold the dry ingredients, in two batches, into the beaten egg whites with a flexible rubber spatula. When the mixture is just smooth and there are no streaks of egg white, stop folding and scrape the batter into the pastry bag (standing the bag in a tall glass helps if you're alone).

Pipe the batter on the parchment-lined baking sheets in 1-inch (3 cm) circles (about 1 tablespoon each of batter), evenly spaced one-inch (3 cm) apart.

Rap the baking sheet a few times firmly on the counter top to flatten the
macarons, then bake them for 15-18 minutes. Let cool completely then remove from baking sheet.

DSC01342
To make the filling, I made a dark chocolate ganache with heavy cream and then mixed in a generous amount of Nutella. These macarons are like little bites of Nutella chocolate heaven!
p.s. If you would like some more detailed instructions and my tips on making perfect little macarons, please look at my Black Sesame Macaron post. I spent much more time on that. I just wanted to get a little something up to honor World Nutella Day before it ended! Thanks to readers for pointing this out ;)

Friday, January 8, 2010

Black Sesame Macarons


IMG_0092


I have always loved the flavor of black sesame. I love the black sesame soup you can get at Chinese restaurants. I love black sesame filled mochi. So when I stumbled across a can of black sesame paste earlier this year at a Chinese market, I knew it would make the perfect filling for some black sesame macarons. One of my favorite flavors in my favorite French confections! What could be better?

When making macarons, it is incredibly important to measure out the ingredients by weight. Slight variations in the weight of the ingredients could result in hideous macarons--I speak from experience. There have been many time where I thought I was making macarons, but what came out of the oven looked like nothing like them. Luckily, I think I've got it down now :)


Sesame Macarons

recipe adapted from Tartlette
makes around 30-40 macarons

90 grams egg whites (about three)
30 grams granulated sugar
200 grams powdered sugar
95 grams ground almonds
15 grams ground black sesame seeds


I always start the process by aging my egg whites on the kitchen counter two days before I plan to make macarons. My mom believes that letting egg whites sit at room temperature for more than an hour is a questionable procedure but it really makes all the difference when it comes to making macarons! Besides, I've never heard of anyone getting sick as a result of aged egg whites in macarons.

For these macarons, I combined blanched almond slivers and black sesame seeds in a food processor with some of the powdered sugar until it turns into a fine flour. I then combine that mixture with the rest of the powdered sugar.

To make the meringue, whip the egg whites until frothy and add the granulated sugar in little by little until it forms stiff peaks.

The next part can be very temperamental. I fold the meringue into the almond mixture in two parts using a spatula. The best description I can give for the consistency you want to obtain is the consistency of lava. Really--molten lava. Don't be afraid of folding it. Granted, over-folding could prove disastrous but don't be intimidated. The mixture does need some good folding until it reaches the perfect consistency. Another way to tell when the mixture is ready is to lift up your spatula and the batter should fall back down in a thick ribbon.

Line two baking sheets with silpat and pipe the batter into 1 inch rounds. The batter will spread a little so don't make them too big or too close together.

Preheat the oven to 280 degrees F.

It is also crucial to let the piped macarons shells sit out for a good 30 minutes, or until slightly hardened. This allows them to develop the coveted "feet" of the macaron.

IMG_9844

Bake for 15-20 minutes and hopefully you end up with perfect little macaron shells to fill with sesame paste!


IMG_0091

perfect with a cup of green tea!


Monday, November 30, 2009

Rose Macarons

Rose-Infused White Chocolate Ganache Macarons
adapted from a recipe found on Cannelle et Vanille

I am macaron-obessed. I realize more and more people are starting to get into the macaron craze. I've aspired to create perfect macarons since the day I recieved my first hand-held mixer as a gift. Since then, I've been pursing the perfect macaron. They're tricky little things to make. I've got the technique down enough so that mine always develop the little "foot" now but I'm still not satisfied. I won't be satisfied until they taste as good as the Laduree macarons I had in Paris!

These turned out okay. I wanted to tint them a light pink and use some rose flavored syrup in the white chocolate filling. I found some sprinkles and decided to add them on before baking. They were little snowflakes. It's almost Christmas-time so it works! I will be trying them again soon and experimenting with different flavors.

IMG_9601


IMG_9606_2

Thursday, September 3, 2009

Parisian Macarons

MACARONS. I LOVE them.
I don't even know where to begin.

The pictures speak for themselves. ENJOY.

Ladurée
75, avenue des Champs-Elysées, 75008

16, rue Royale, 75008


flavors (from left to right): salted caramel MY FAVORITE, pistachio, coconut, chocolate, coffee, red berries, and orange blossom

flavors (from upper left to lower right): rose MY 2nd FAVORITE, bitter chocolate, caramel, coconut, coffe, orange blossom, pistachio, orange bergamot...all in a beautiful little box


Pierre Hermé
4, rue Cambon, 75001

a beautiful display of rows and rows of perfect macarons sprinkled with iridescent powder

flavors (starting from top): jasmine tea, passionfruit milk chocolate, salted caramel, and apricot pistachio...the flavors here are much more inventive than the traditional ones are Laduree


and finally...
Nutella Macarons by Christina

My homemade macarons are nothing like the exquisite light, crumbly, delicate Parisian macarons but there's something about watching the foot of the macarons rise in the oven that is just so satisfying.